Vket.com › My Page TOP ›
Submission Workflow › Vket 2026 Winter ›
Submission Guide › Item Exhibition
Submission Guide (Item Exhibition)
We are currently preparing the video for release. It will be available soon.
This article explains the submission process for Item Exhibitions at Vket 2026 Winter using Unity Submission (VketTools).
For Item Exhibitions, you configure how your exhibit is displayed in the VketTools window. The main settings are as follows:
- Item Pickup settings
- You can choose whether visitors can pick up your whole exhibit.
- Avatar Pedestal settings
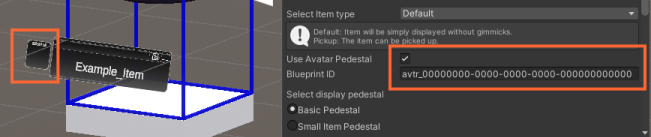
- You can place an Avatar Pedestal on the caption board. It can be used together with Pickup.
- Pedestal settings
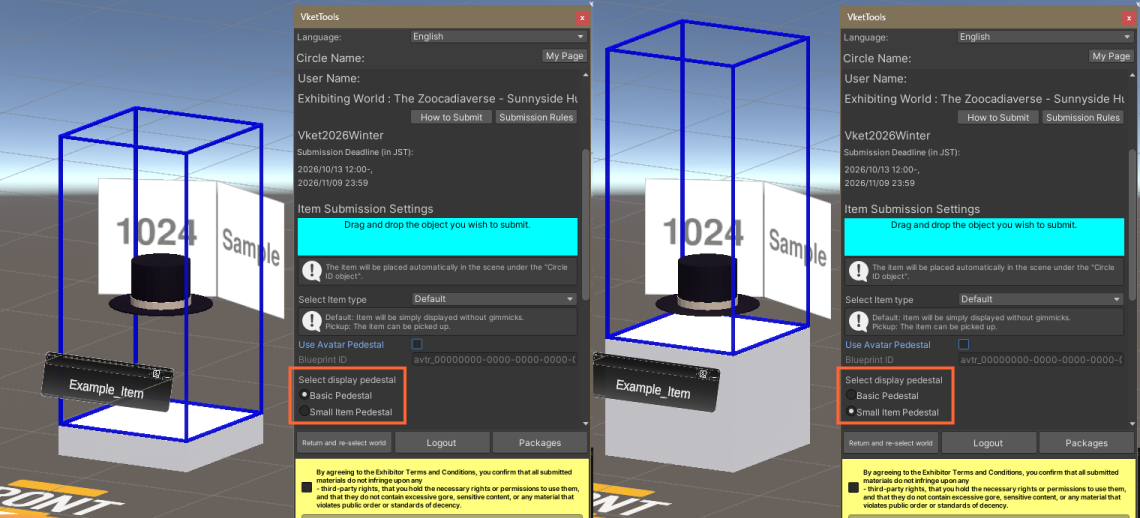
- Your exhibit will be placed on the pedestal object provided by Vket. You can choose between two pedestals of different heights:
Basic Pedestal and Small Item Pedestal. - Please be sure to check the design of the pedestal in the Preview World after submission.
- Product name, thumbnail, and product link settings
- The product name and the product link are shown on the caption board in front of your exhibit, and two thumbnail images are shown behind it.
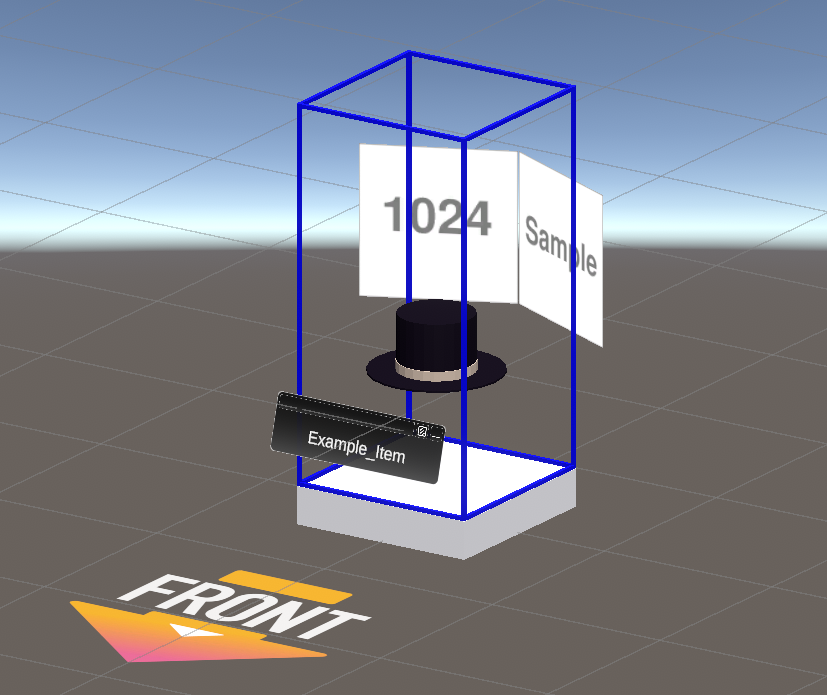
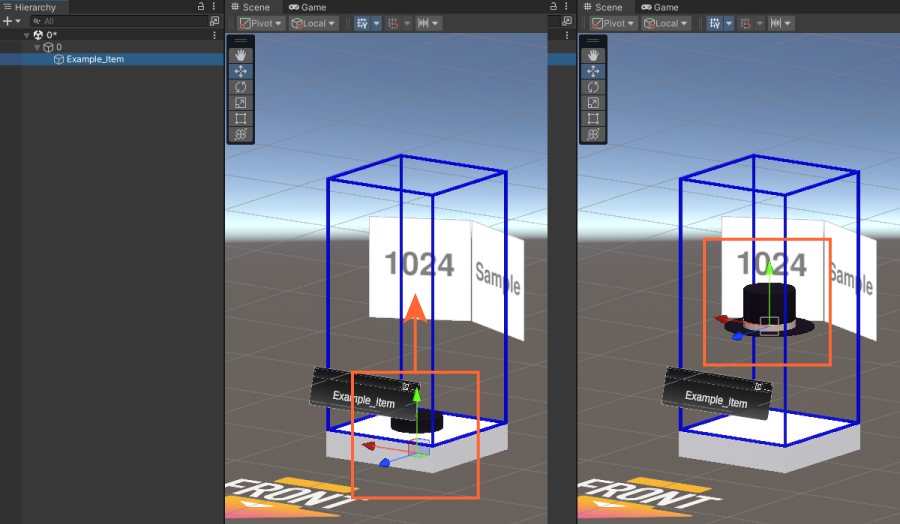
In the Scene, a blue frame appears on top of the selected pedestal, showing the space where you can place your exhibit (1m wide × 1m deep × 2m high). Adjust the position of your exhibit so that it fits inside the frame.
For how to configure each setting, see 4.4 Item Exhibition Settings.
For details, please refer to the submission rules in the page below:
For Unity Submission (VketTools), the exhibitor needs to make an Exhibitor Circle Registration on Mypage beforehand. Then, using the VRChat Creator Companion, create a Unity project using the Unity 2022 World Project template and import necessary packages. This will setup the environment for your own Vket exhibition!
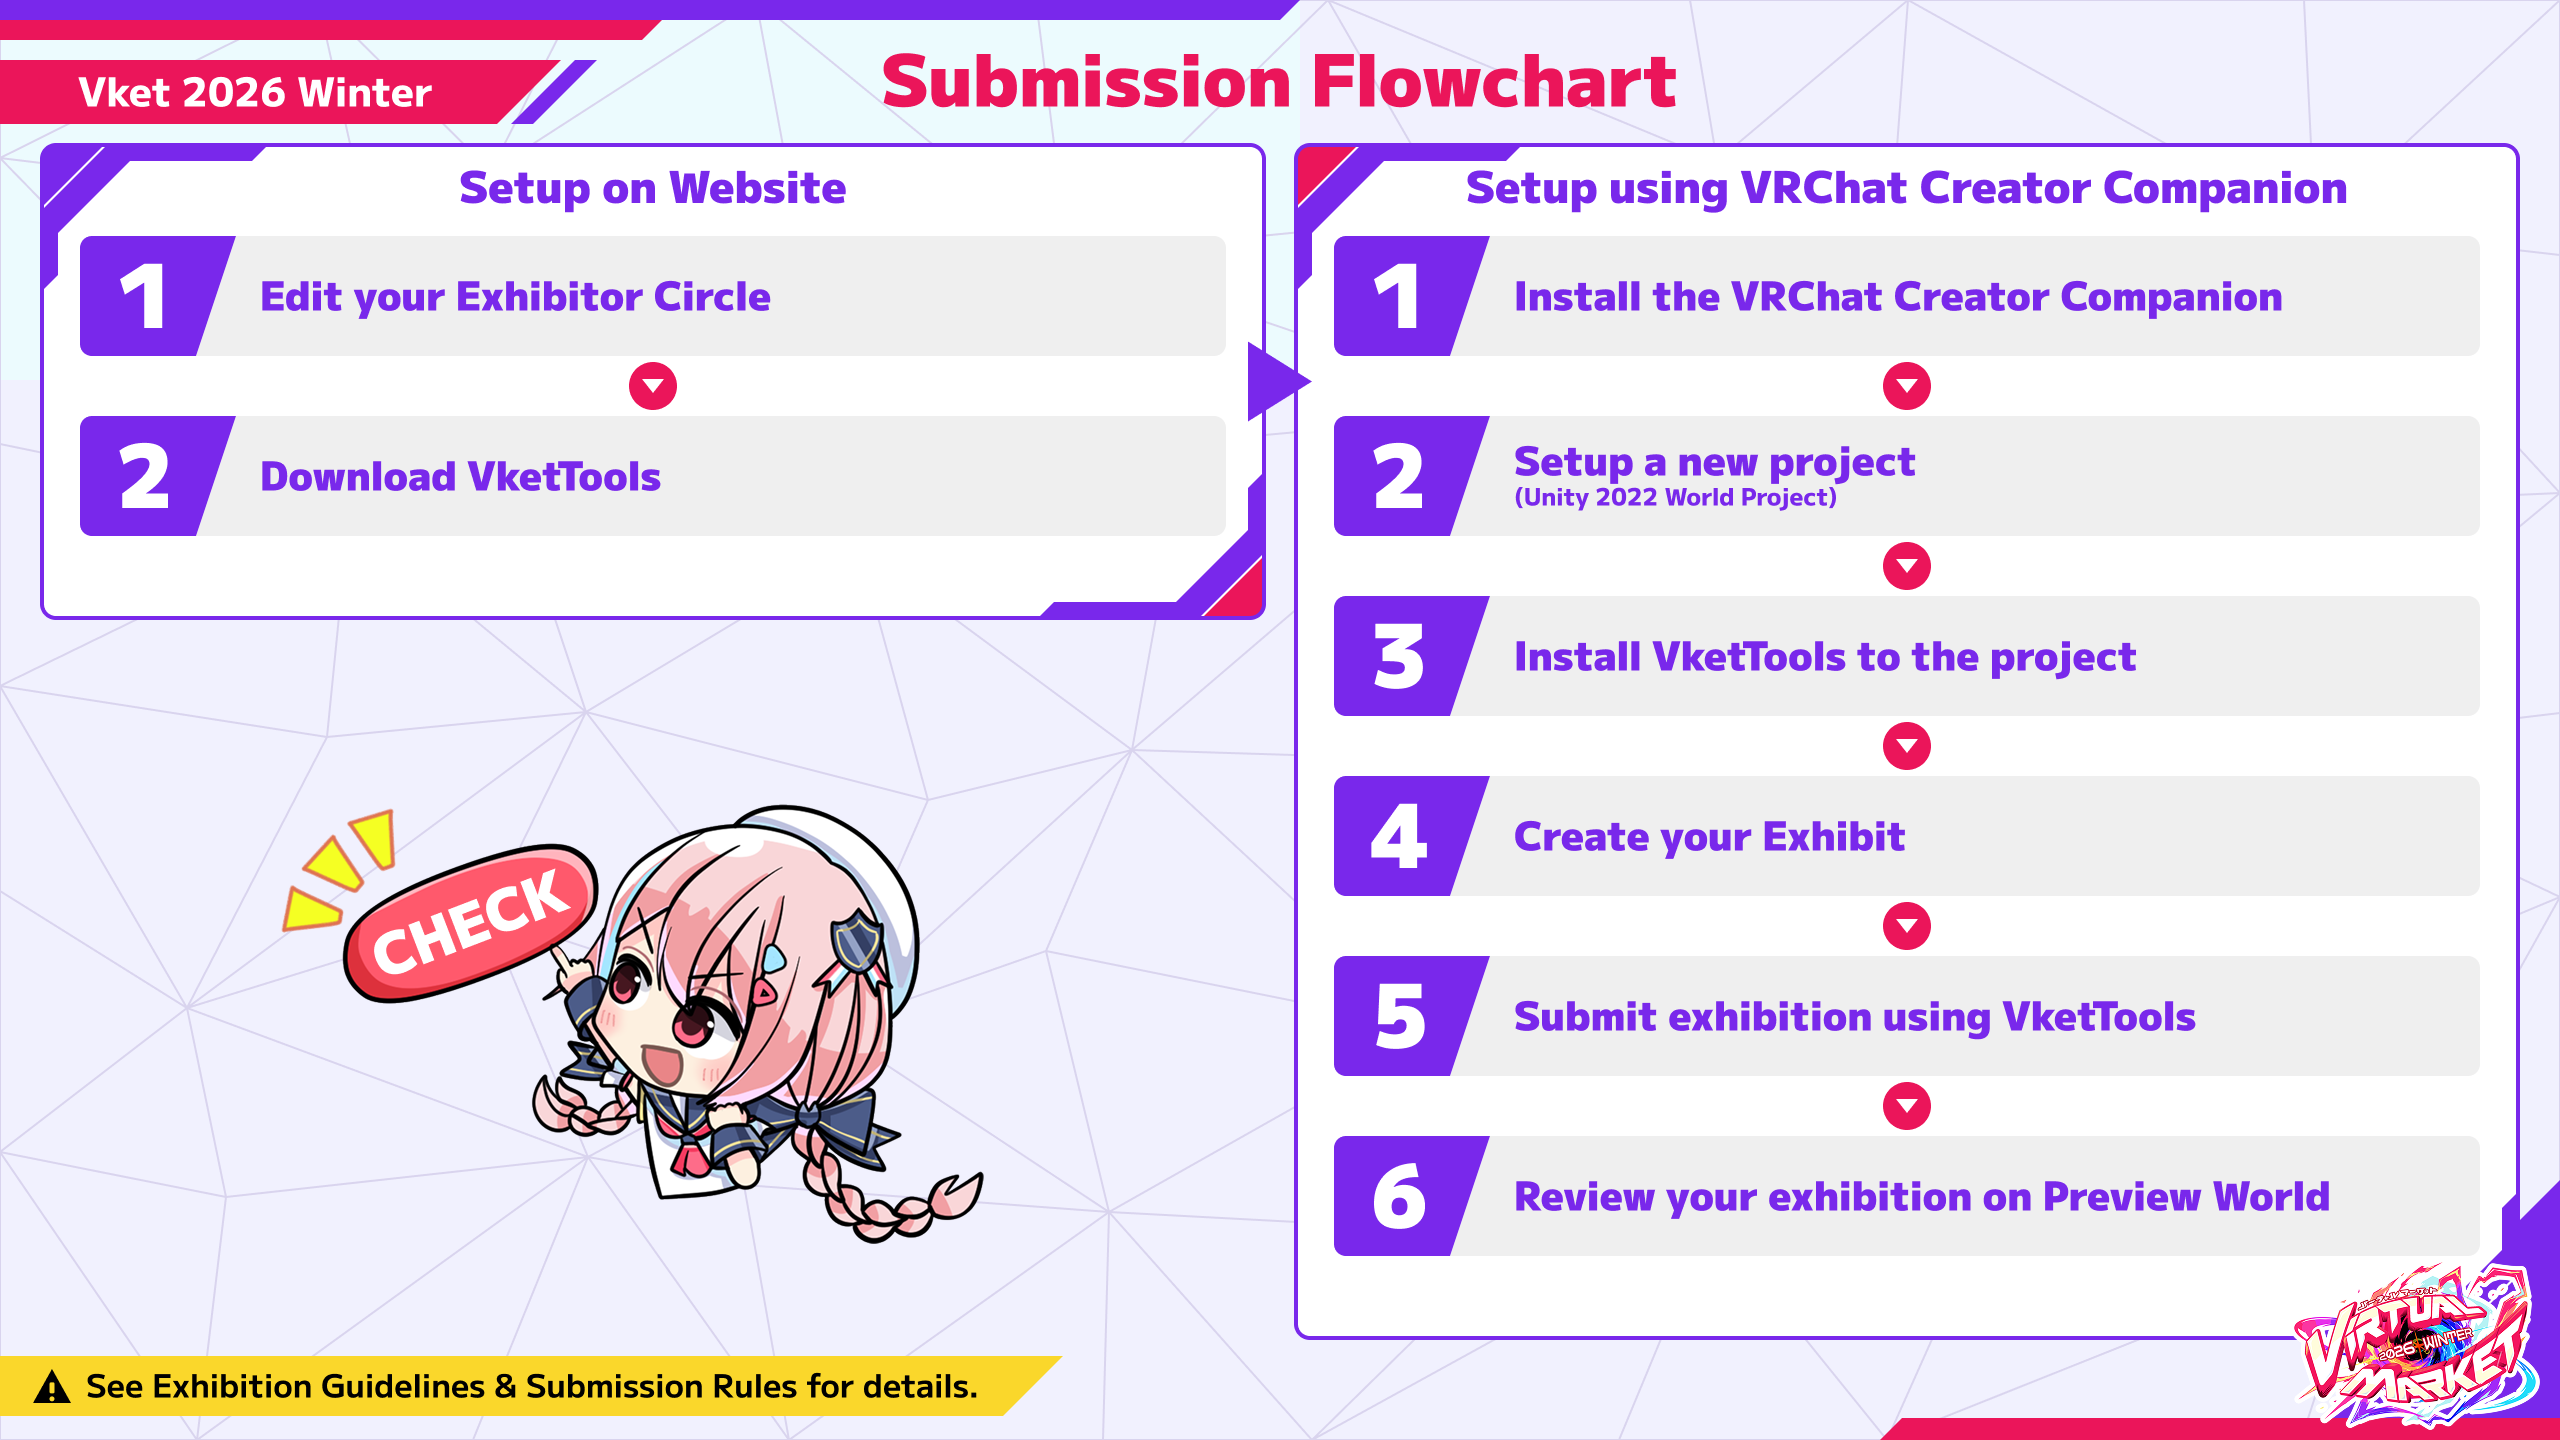
Setup on Website
- Register your Exhibitor Circle
- Download VketTools
Setup using VRChat Creator Companion
- Install the VRChat Creator Companion
- Create your project (Unity 2022 World Project template)
- Setup VketTools on the project
- Create your Exhibition
- Submit exhibition data using VketTools
Advice before creating your exhibition
- For Item Exhibitions, the only available Vket Official Asset is the VketZoocadiaItem component for The Zoocadiaverse, which can be used only when exhibiting in The Zoocadiaverse.
- If you have any questions, please feel free to ask on the Vket Exhibitor Discord.
- Also, we provide Submission Tips as a part of technical support.
- Please also refer to the Reverse Index, which summarizes helpful information based on your objectives.
The Submission period starts from October 13, 2026 (Tue) 12:00 pm JST / 3:00 am UTC / October 12, 11:00 pm EDT and ends at November 9, 2026 (Mon) 11:59:59 pm JST / 2:59:59 pm UTC / 9:59:59 am EST.
During this period, you can submit at any time, and you may also resubmit as many times as you like. You can preview your exhibition on the preview world, which will be updated periodically.
*Note: Circle registration is now required on applying for an exhibition! If you've already registered your exhibitor circle, feel free to skip this step.
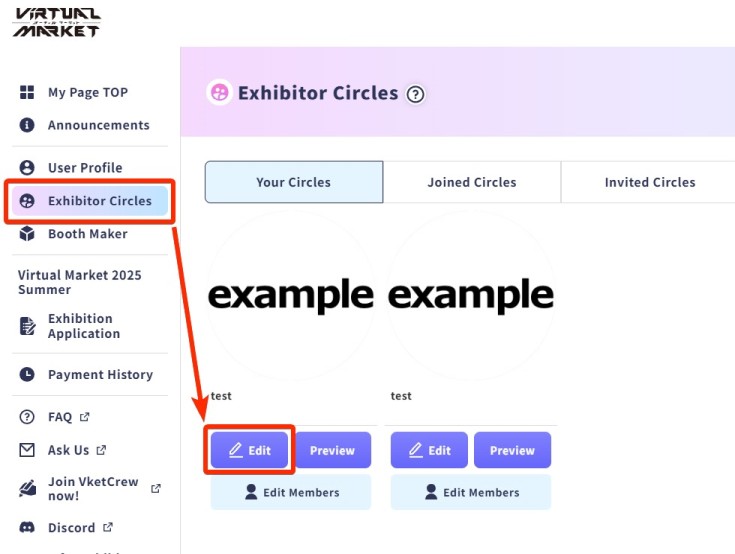
On the Vket website's "Mypage", which is accessible via the top right corner of the website after login, you will find the "Edit" button on the "Exhibitor Circles" page.
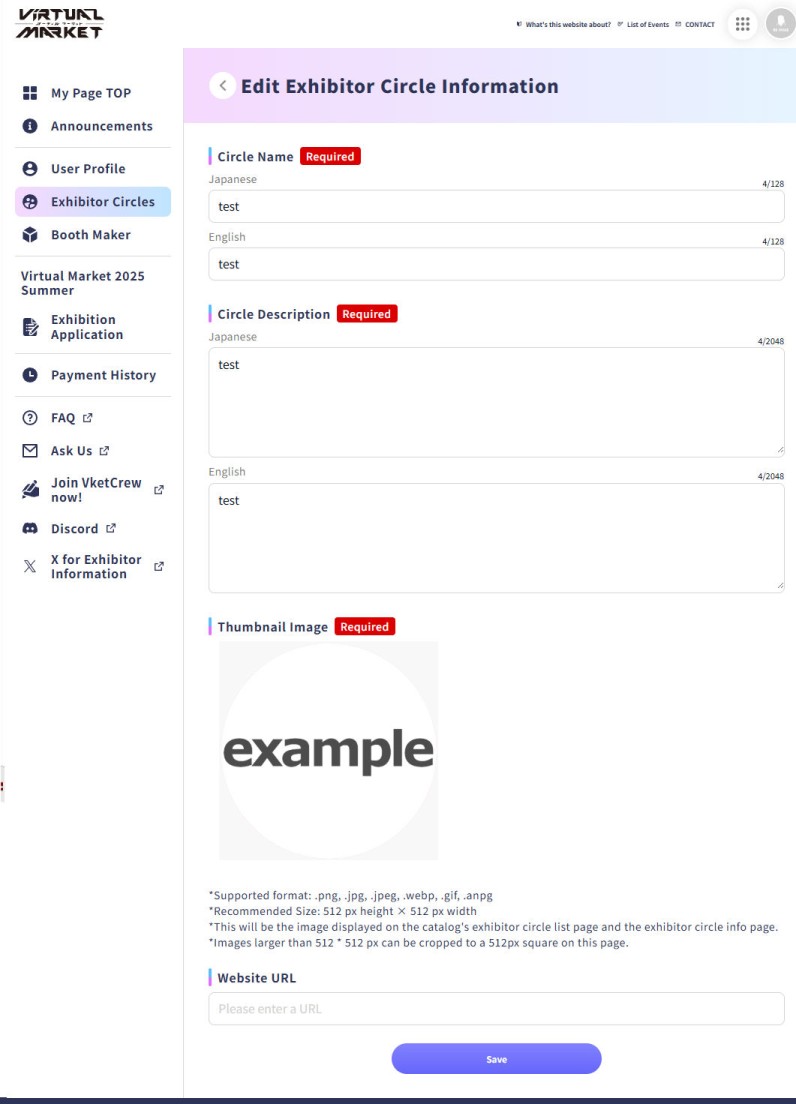
On the Edit Exhibitor Circle Information page, the exhibitor should input their exhibitor circle name and description.
The input text and contents will be displayed on the catalog page that will be released before the event opening.
To add members to your circle, please follow the steps below:
Click here to expand how to add circle members
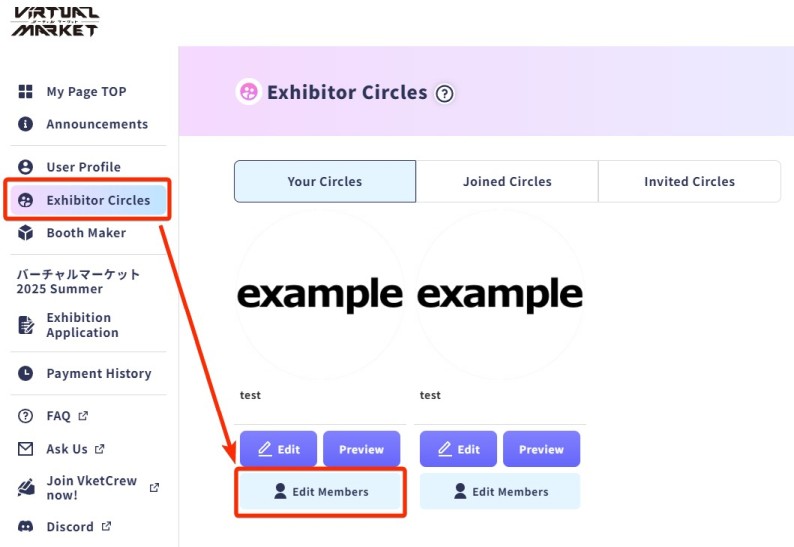
You can invite members from Edit Members on the Exhibitor Circles page.
At this time, the person being invited must have already created a Vket Account and logged in to their My Page.
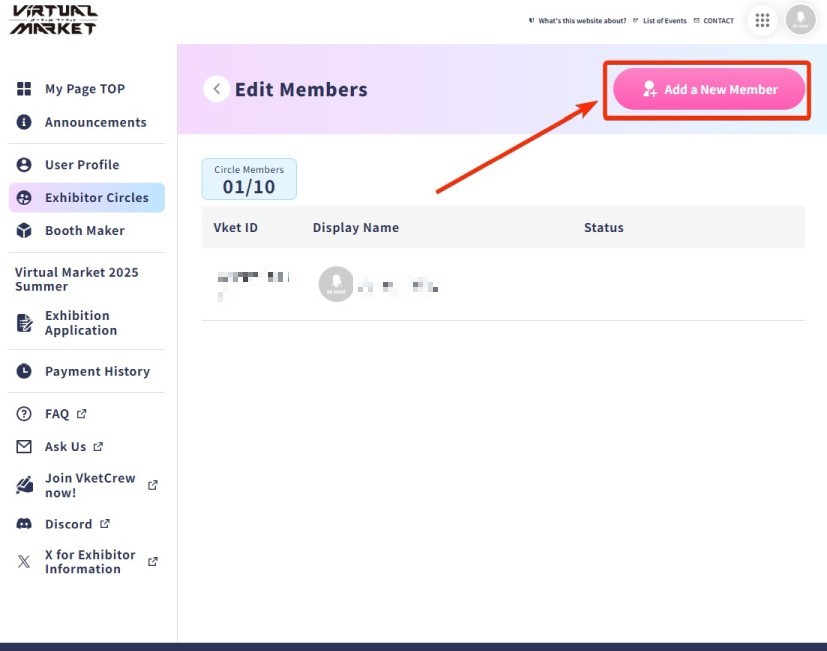
After clicking Add a new Member on the "Edit Members" page, enter the member's VketID and click Submit invite.
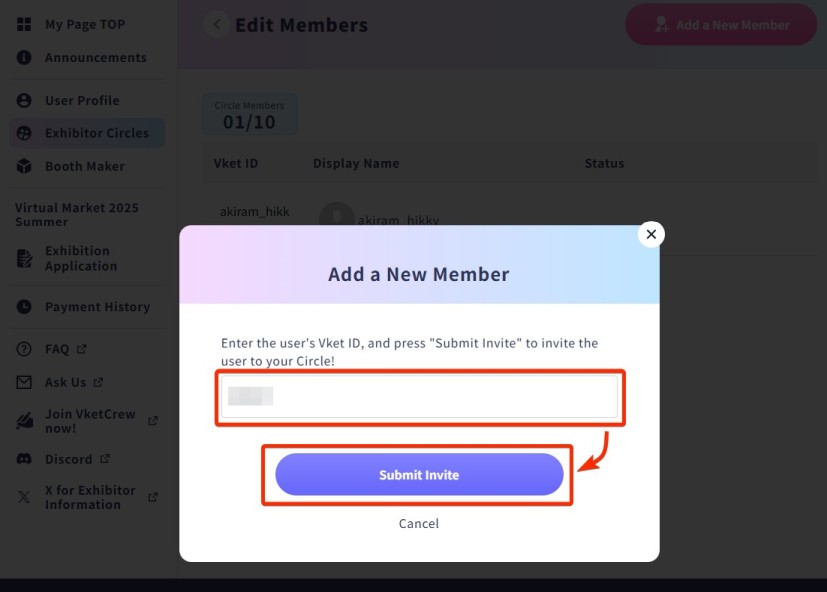
The member will be added to the member list in a "Pending Approval" status.
The invited member will see the newly displayed circle under Exhibitor Circles in the left-hand menu of their My Page.
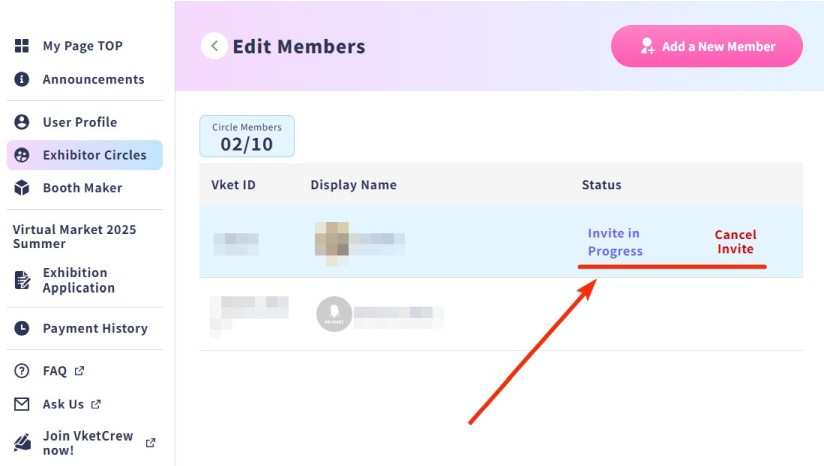
*If you accidentally add a member, you can cancel or delete the invitation by clicking Cancel or Delete on the right side of the member you wish to remove on the "Circle Member Management" page.
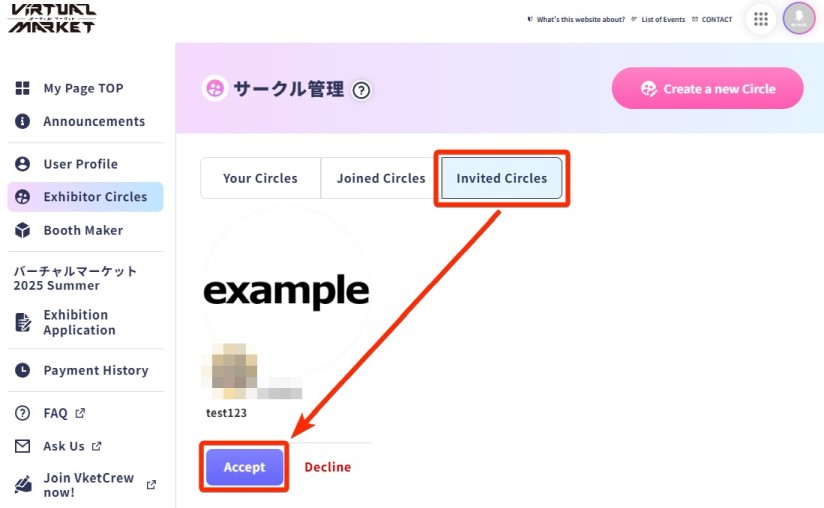
The invited member can join the circle by opening the Exhibitor Circles > Invited Circles page and clicking Accept for the invited circle.
By doing so, the member's name will be listed in the catalog, and the member will be able to use VketTools functionalities other than submission.
Please utilize this feature when creating an exhibition space with multiple members!
- Please verify that the invited member's
VketID is correct. The VketID can be found on their Profile page. - If "Invitation sent successfully" is displayed but the invited circle is not shown in the list of joined circles, the invited member should try reloading the page or clearing their browser cache.
*Only the circle owner can upload submissions.
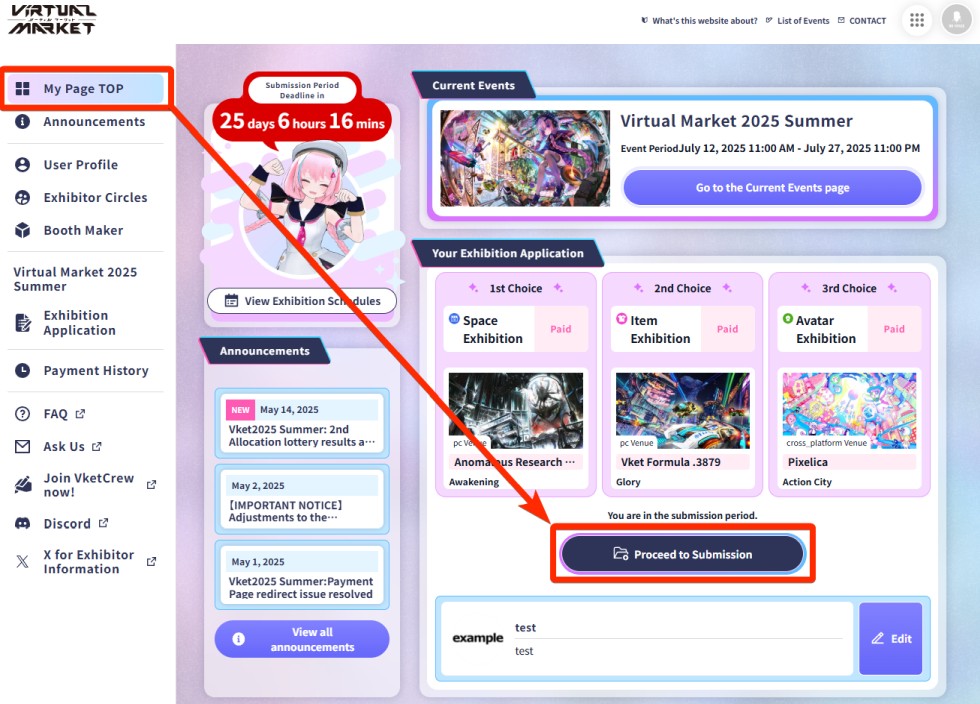
Once your circle information registration is complete, click the Proceed to Submission button from your My Page TOP.
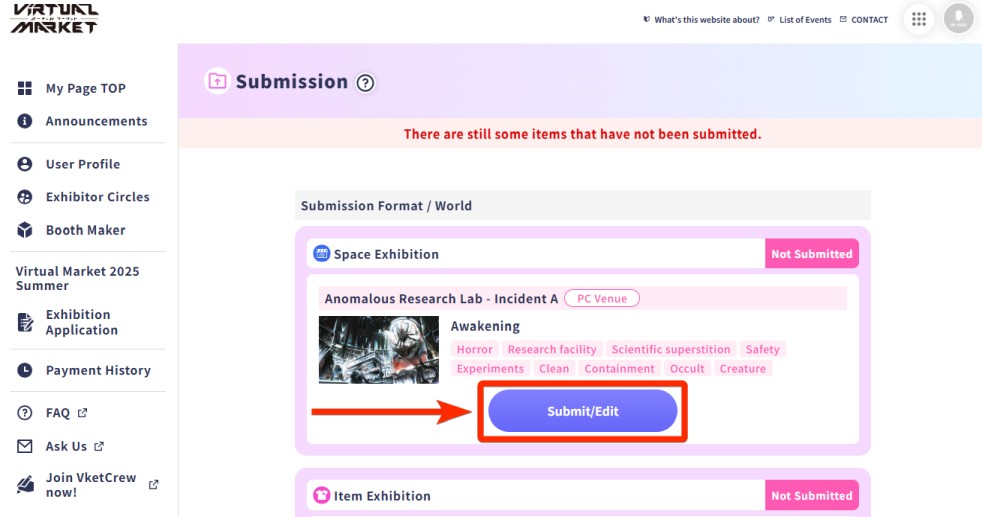
A list of worlds available for submission will open. Click the Submit/Edit button.
You will enter the submission screen for the selected world. Click Download VketTools to start downloading VketTools.
*You can also enter the Preview World from this screen.
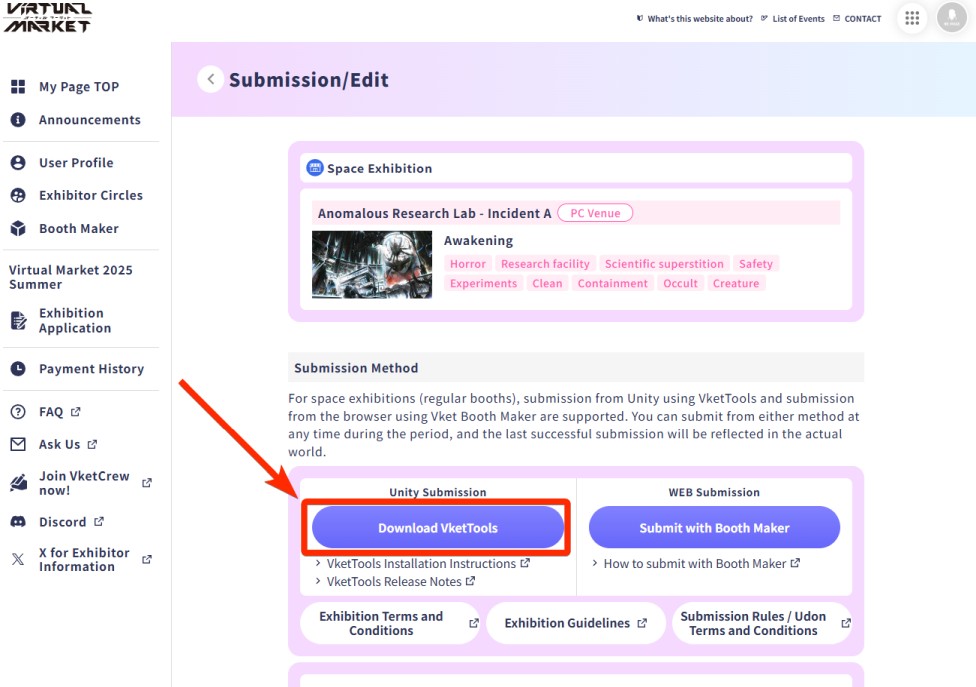
Once you have download the tool, proceed to the VRChat Creator Companion.
VRChat Creator Companion is required to use VketTools.
Detailed instructions on how to install VRChat Creator Companion and Unity can be found on the following page. Please refer to it.
Setup the VRChat Creator Companion
- Press "Create New Project" in the "Projects" page.
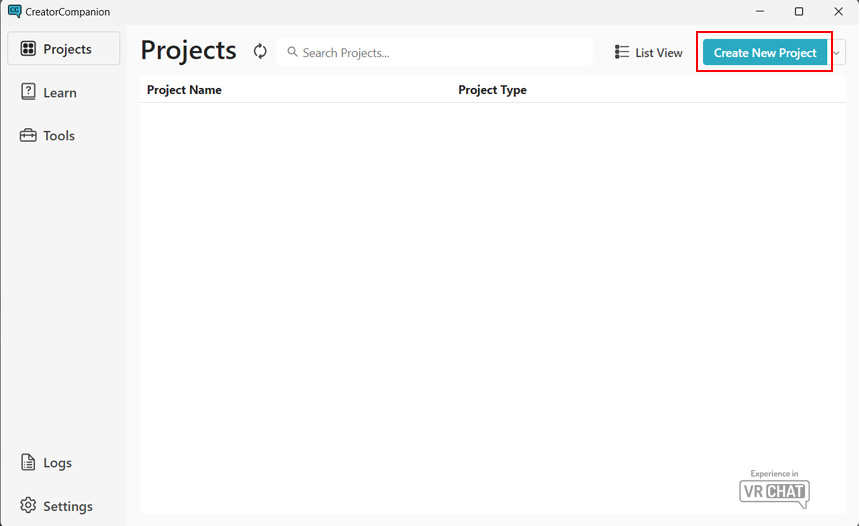
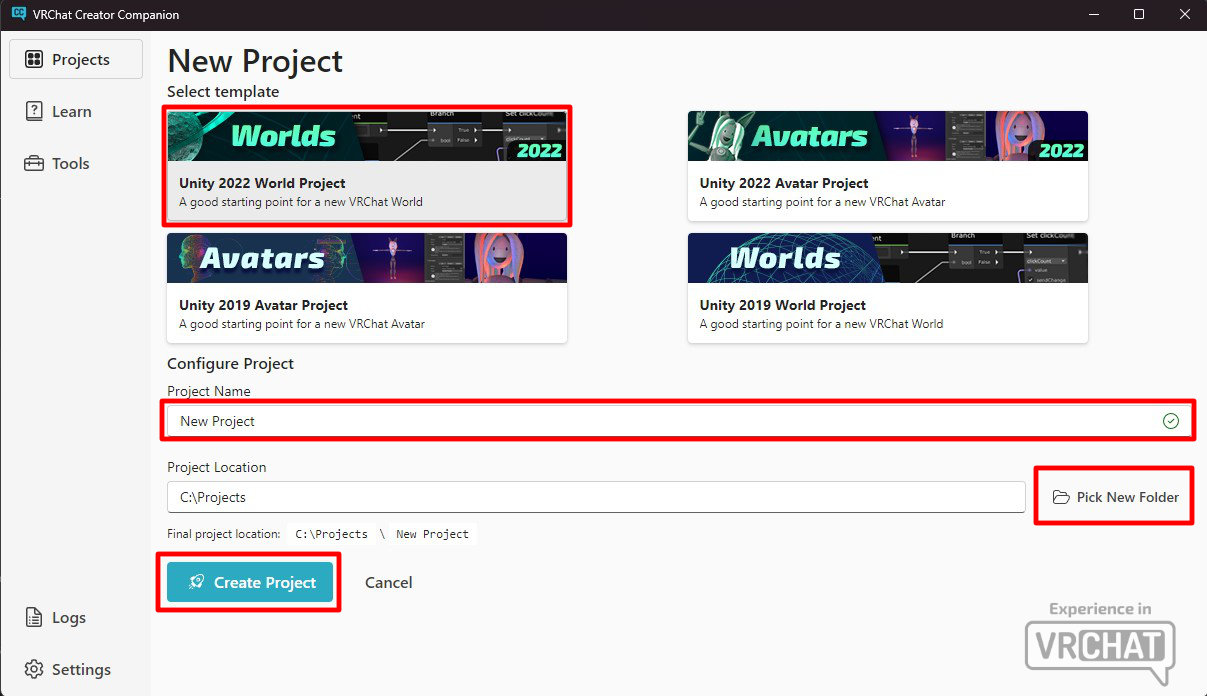
- Select
Unity 2022 World Project in the template, designate your project name and project location at your choice, and press "Create Project".
*To avoid reference path errors, Please avoid using full-width characters such as Japanese characters, and spaces for Project Name and Project Location. It is recommended to write without spaces, or use underscores(_) instead.
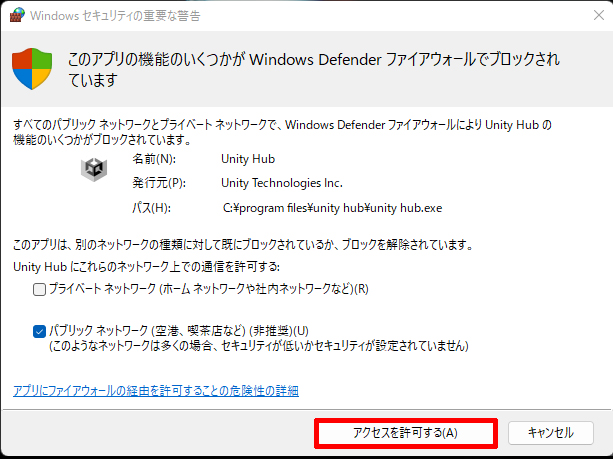
- If the firewall alert appears, press "Allow Access".
- Project packages will be automatically selected.
There may be an older version of the VRChat SDK installed. If so, click the area highlighted in red in the image below to update to the latest version.
*If nothing is shown in the red box, you can skip this step and proceed to step 6.
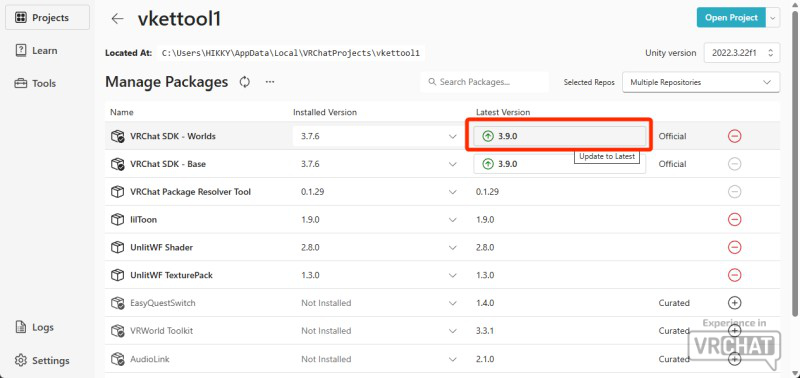
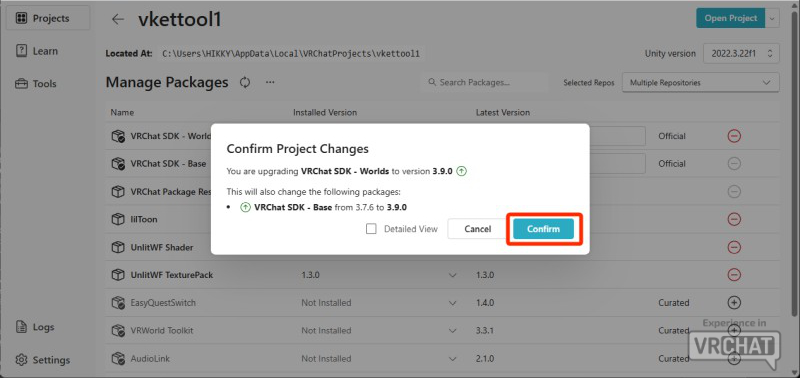
- A confirmation dialog will appear — press
Confirm.
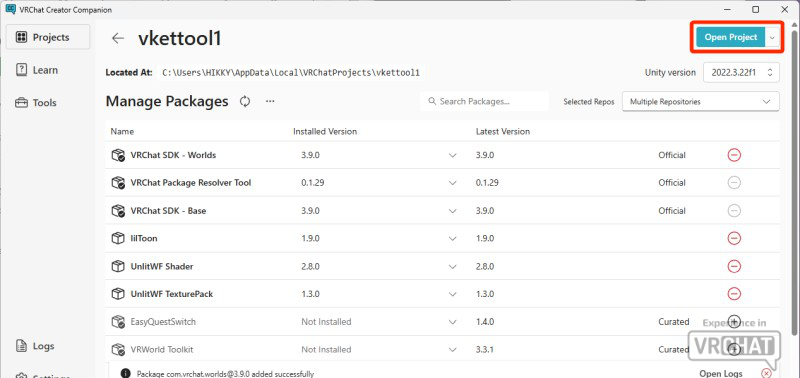
- Once the update completes, press
Open Project at the top right.
After loading, Unity will launch.
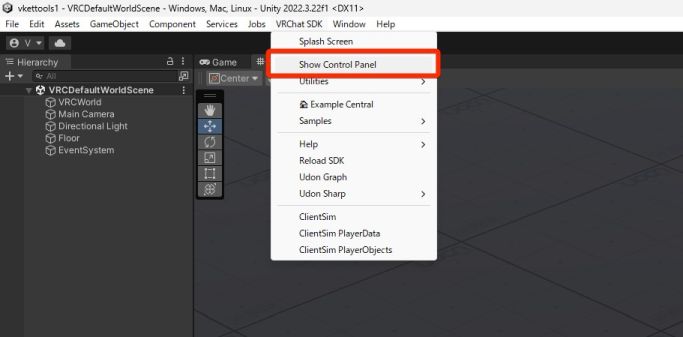
- In Unity, press VRChat SDK in the top menu and press Show Control Panel.
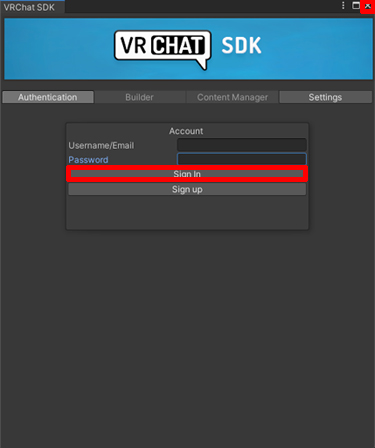
- In the Authentication window of VRChat SDK, input your Username/Email and Password. Press Sign In.
Close the window to complete the process.
- The "VketTools" is a package of essential tools and prefabs needed to create your exhibition for Vket.
Press Assets in the top bar and choose Import Package. Press Custom Package. - Choose
VketTools-2026W.*.unitypackage that you've just downloaded and Open it. - In the Import Unity Package window, press Import.
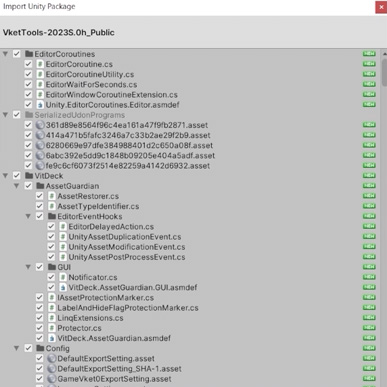
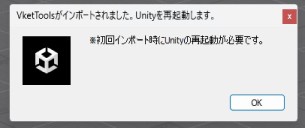
- A message prompting you to restart Unity will appear, so click
OK to automatically restart Unity.
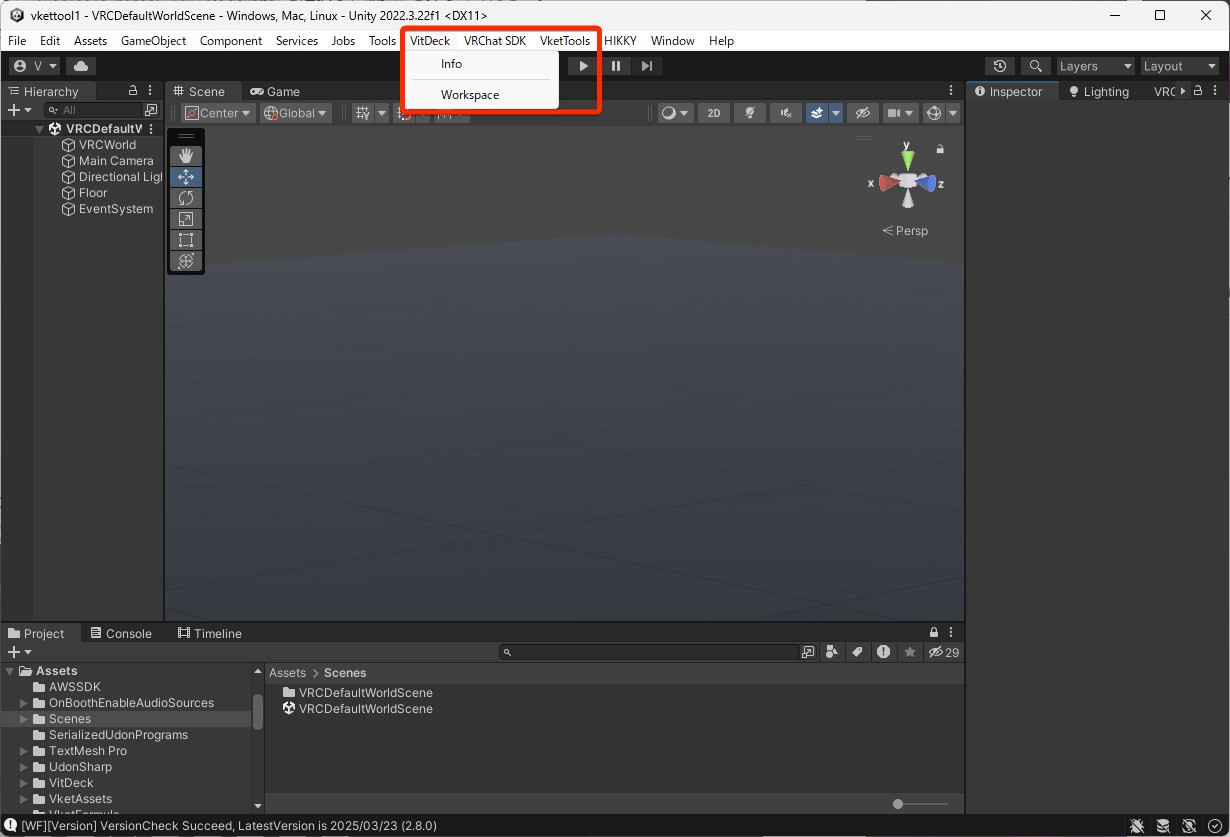
- After the installation is complete, if you see
VitDeck and VketTools in the top menu, the installation is complete.
Now that the project is ready, download the necessary assets and create the scene for creating your exhibition.
- Open
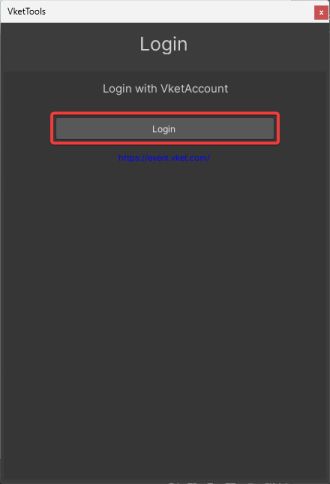
VketTools/Show Control Panel from the Unity menu. Click the Open the Builder tab button, and click on the Login button for the Vket account shown as below:
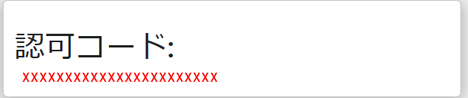
- At first login, you will see a webpage with your authorization code. Copy this code to the clipboard.
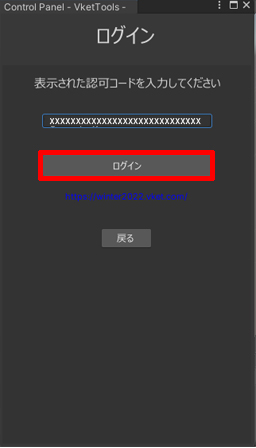
- Paste the authorization code to the login window, and click “login”.
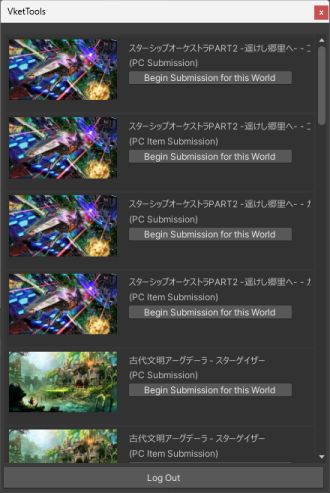
- If the login is successful, the list of venue worlds will appear as below. Choose the world you will exhibit, and select "Begin Submission for this World".
- If the Control Panel - VketTools - displays the mypage information, the setup is complete.
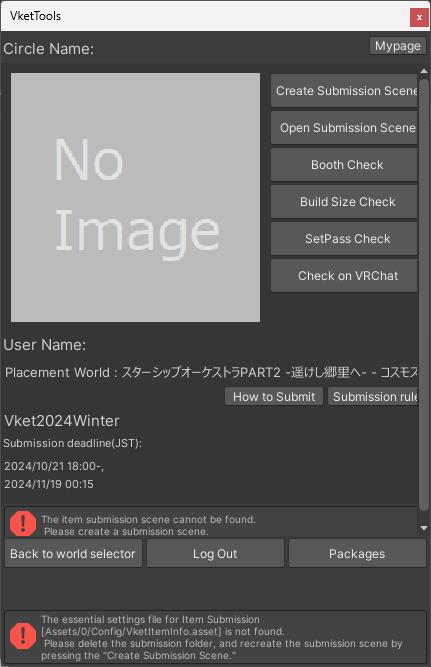
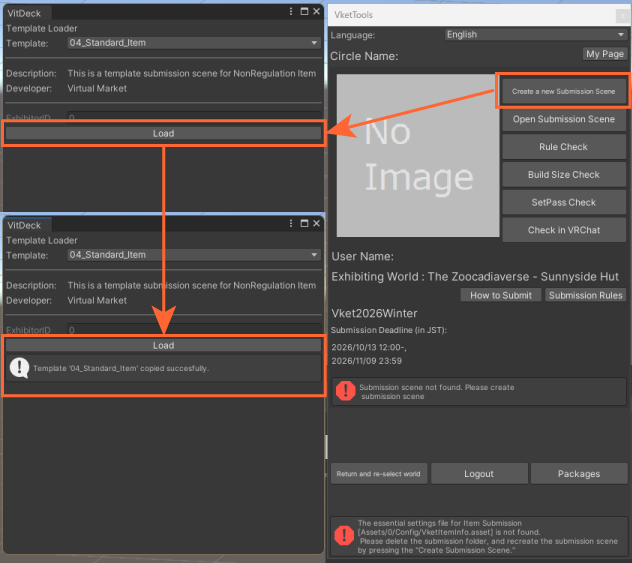
- From VketTools' Control Panel, click on
Create a new Submission Scene. - The VitDeck window will open, therefore select
Load.
*If the VitDeck window does not open, please check if it is displayed behind other Unity windows.
*This window may be closed when the loading is over.
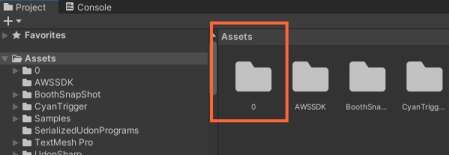
- A folder and a scene file named after your Circle ID will be generated directly under the Assets folder.
*A Circle ID is automatically assigned to each exhibitor circle.
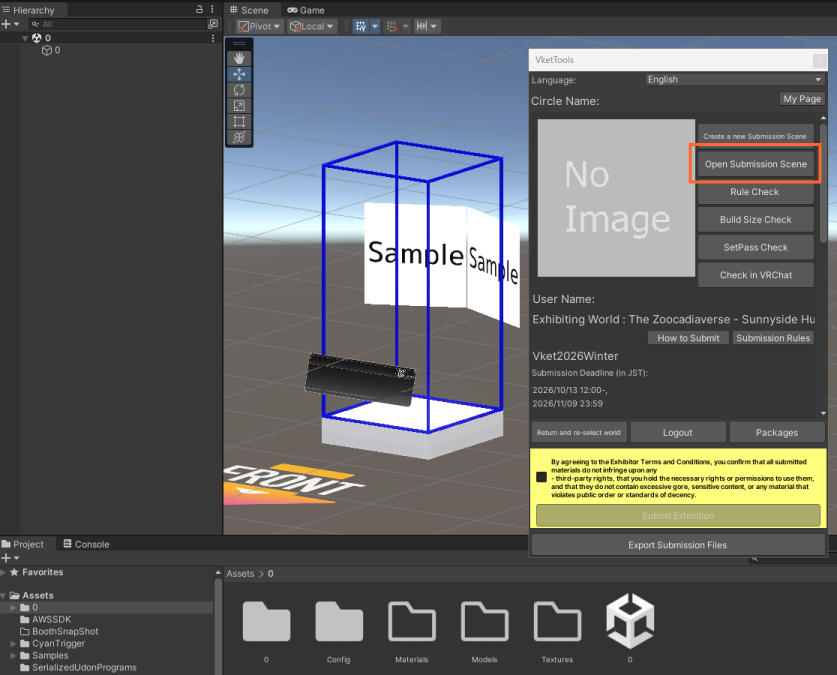
- Click
Open Submission Scene in VketTools. The scene file in the generated folder will open, and the scene for submission will be displayed.
Caution!
If you have multiple exhibitions to submit, be sure to use a separate project for each submission.
As per "Scene hierarchy structure regulations" in the Submission Rules, the submission Scene's hierarchy will be set up as follows.
Please note that creating exhibition for Item Exhibition will be done in VketTools' Control Panel, which includes allocating the item and Prefab setup.
Editing on the Hierarchy will be generally unneeded.
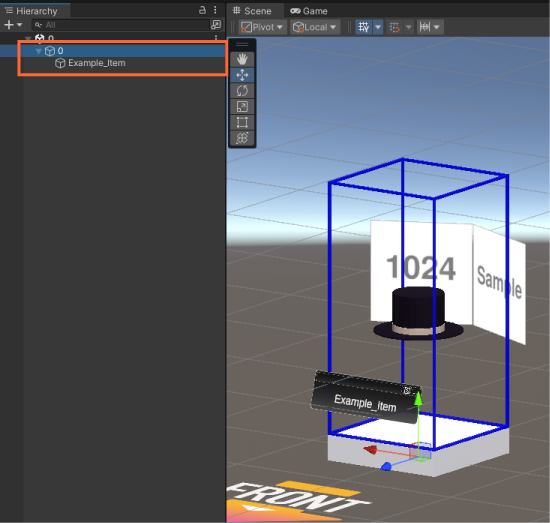
- In the submission scene, the lighting environment is not set similar to the venue world.
- To check how your exhibition will look in the venue including the lighting, please visit the Preview World.
For submission, import the 3D model into your Unity project, and then drag & drop the imported 3D model file or Prefab into the area in the VketTools screen that says Drag and drop the object you wish to submit. It will be placed under (Circle ID) for submission.
*You can also drag and drop Prefabs or objects that are already in the scene. They will also be placed under (Circle ID).
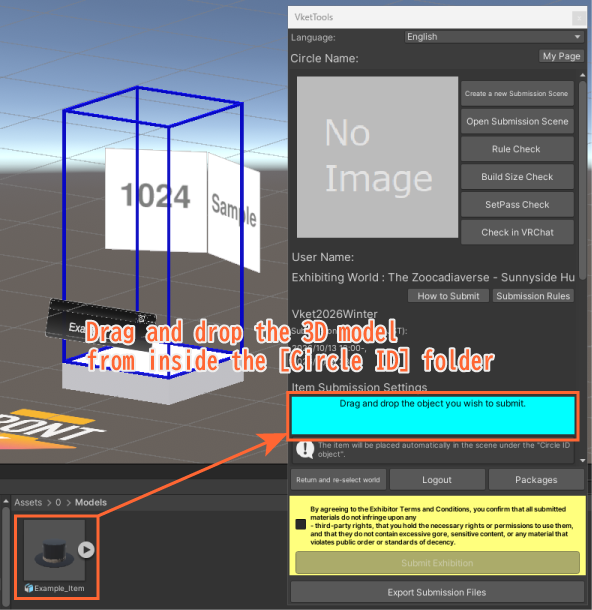
The item will be placed at the origin (0,0,0). After it has been placed, adjust its position and rotation so that it sits on the pedestal.
You can also change the following settings:
- Item Pickup settings
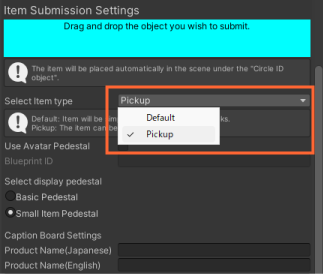
- Select
Pickup in Select Item type to allow visitors to pick up your whole exhibit. - The Pickup gimmick will be set up by Vket when the exhibit is placed. The position of a picked-up exhibit is synced, and it returns to its original position a while after it is released.
- Avatar Pedestal settings
- Check
Use Avatar Pedestal and enter a Blueprint ID (an ID starting with avtr_) to place an Avatar Pedestal on the caption board. - Please note that the avatar must be set to Public so that visitors can try it on.
- Pedestal settings
- Your exhibit will be placed on the pedestal object provided by Vket. Use
Select display pedestal in VketTools to choose either Basic Pedestal or Small Item Pedestal. The two pedestals have different heights. - In the Scene, a blue frame appears on top of the selected pedestal, showing the space where you can place your exhibit (1m wide × 1m deep × 2m high). Adjust the position of your exhibit so that it fits inside the frame.
- Please be sure to check the design of the pedestal in the Preview World after submission.
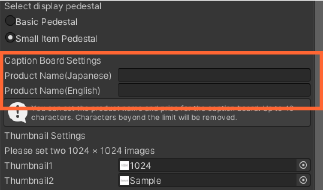
- Product name settings
- You can enter a product name in Japanese and in English. Each can be up to 40 characters (20 characters if you use full-width characters such as Japanese).
- A caption board showing the product name and other information will be placed in front of your exhibit.
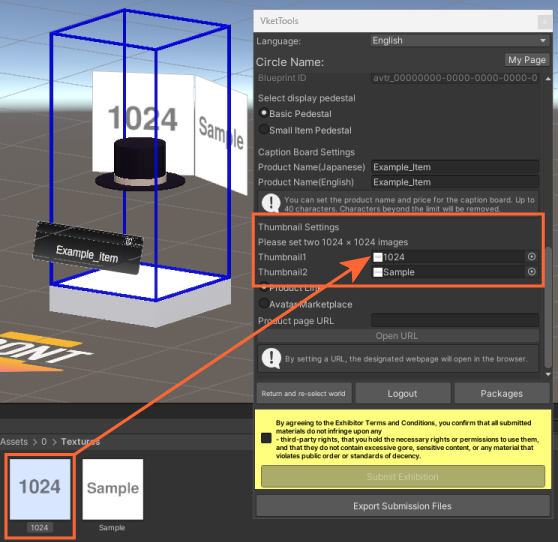
- Thumbnail settings
- In
Thumbnail Settings, please set two 1024×1024 images. The images will be displayed side by side behind your exhibit. Setting both images is required. - Please store the images in the folder named after your Circle ID as well. Use JPEG or PNG format.
- Do not drag and drop images directly into the Hierarchy. Doing so may lead to unintended visual errors.
- Product link settings
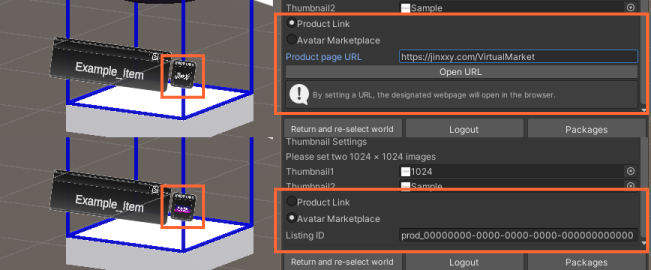
- You can set one link to your product page. Choose either
Product Link or Avatar Marketplace.
- If you choose
Product Link, enter the URL of the product sales page in the Product page URL field. An external link button will be displayed. - If you choose
Avatar Marketplace, enter the Listing ID of your product on the Avatar Marketplace (an ID starting with prod_) in the Listing ID field.
- Only product pages on the following online stores can be set for the external link button:
- *Please note that the external link button for
Product Link only works in the Vket venue worlds during the event period. It does not work in the local preview or in the Preview World. - *The
Avatar Marketplace button does not work in Check in VRChat, but it works in the Preview World.
For details, please refer to the submission rules in the page below:
To ensure that your exhibit is within the limits defined in the submission rules while you are still working on it, please use the following buttons in VketTools:
- Rule Check: Checks for compliance with submission rules, such as layer settings and the presence of prohibited components.
- Build Size Check: Checks if the build size of the exhibit is within the limit.
- SetPass Check: Checks the rendering load (SetPass Calls / Batches) of the exhibit.
Note that these checks are also performed automatically when you press the Submission button.
Each check has a different purpose, but if you are unsure, please press them in order from top to bottom to verify.
💡 For tips on reducing exhibit weight (optimization), please also refer to the Reverse Index.
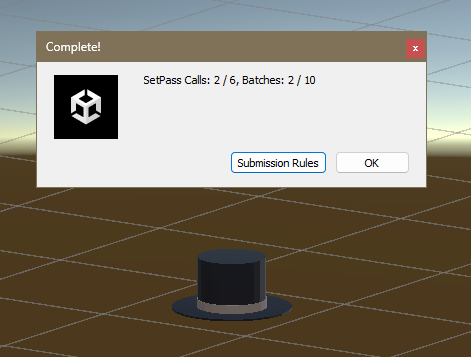
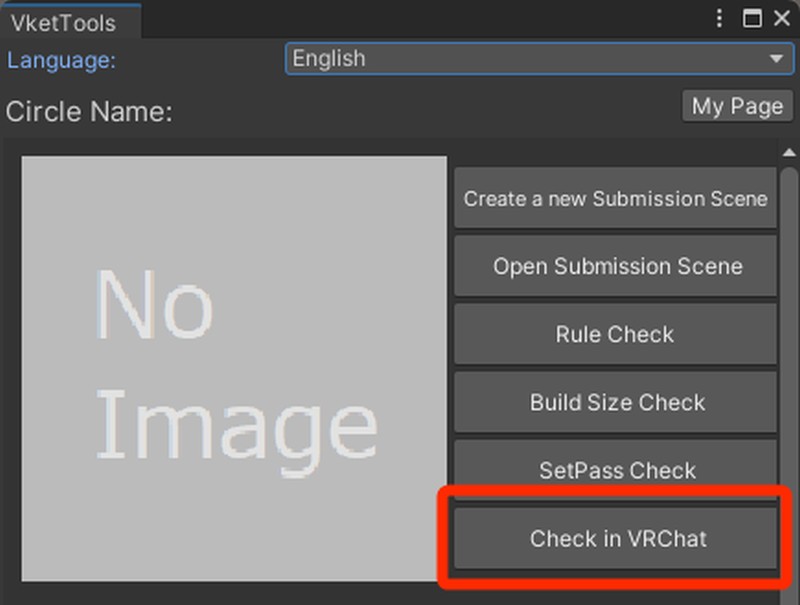
Pressing the Check in VRChat button in VketTools will launch VRChat and load the current scene as a world.
- Click the
Check in VRChat button in VketTools.
- VRChat will launch and the submission scene will load as a world. Check that the appearance, effects, and any gimmicks work correctly.
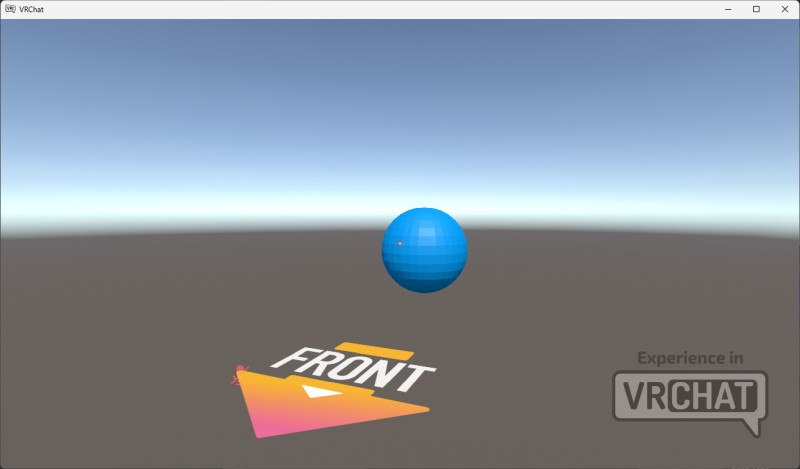
Note: Some gimmicks may only function during the event period. Please check the specifications for each component.
- After checking, close VRChat and return to Unity.
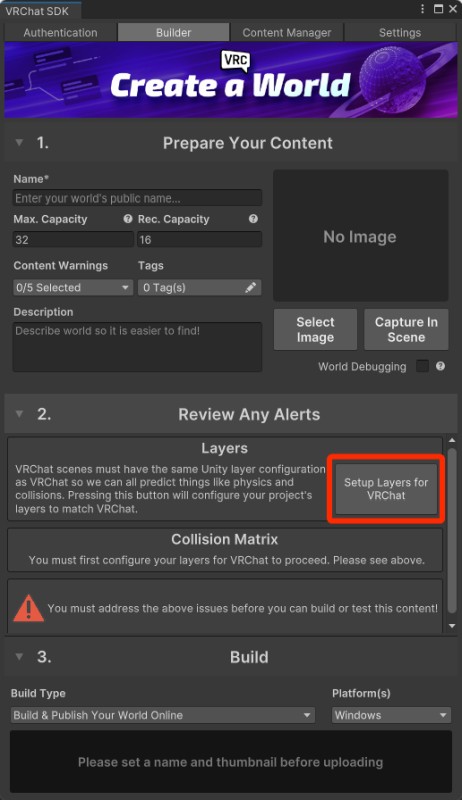
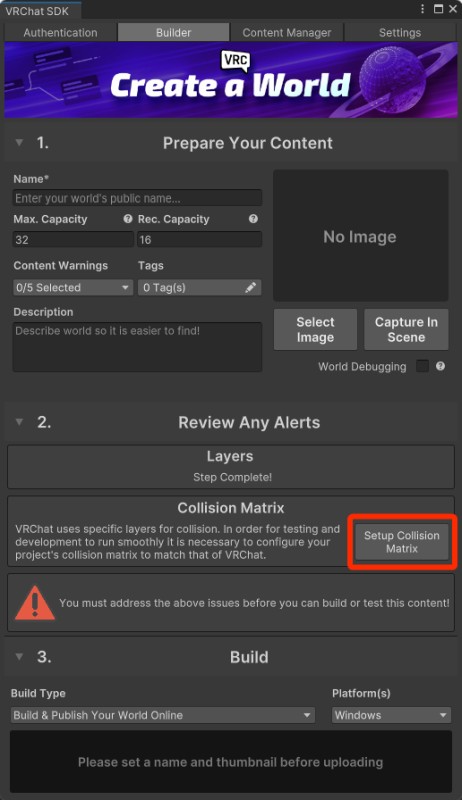
Note: If VRChat does not start, you may need to configure the VRChat SDK.
Use the Setup Layers for VRChat or Setup Collision Matrix buttons to perform the required setup.
- Clicking
Submit Exhibition on the Control Panel will begin the submission process for the current Scene content.
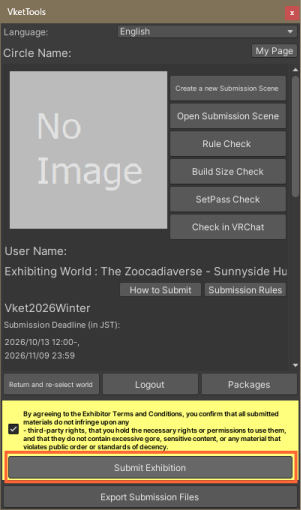
- Once the submission starts, various checks will be performed in eight steps, as shown below.
The VRChat client will be launched and build your Submission Scene into a world.
Please check if Pickups and Avatar Pedestals set in the exhibition are working correctly. - After confirming everything, click the
Confirm button in Unity to continue the process.
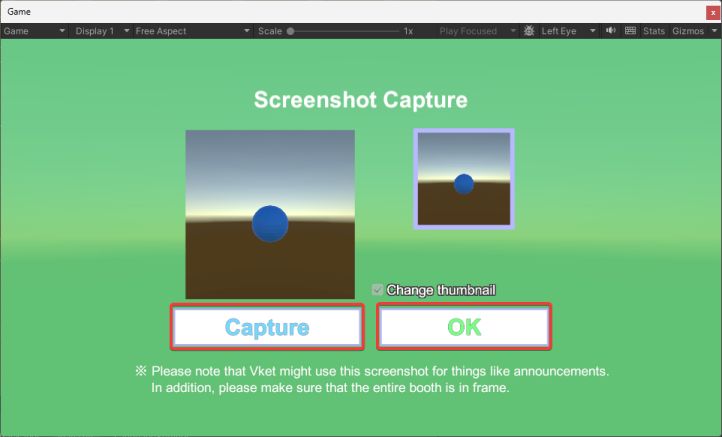
- After the Rule Check, Build Size Check, and SetPass Check, the Screenshot Capture window will open. Please click the
Capture button to take a screenshot, and then click OK.
*During the SetPass Check, the VketTools window closes temporarily and a camera rotates to measure the rendering load. The window will reappear when the measurement is complete.
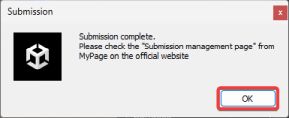
- When the message
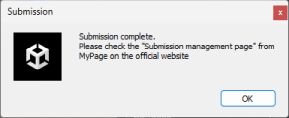
Please check the Submission Management Page from My Page on the official website. appears, click OK. Your submission is now complete.
*If Submission failed. Please correct the error and resubmit. appears, run Rule Check, Build Size Check, and SetPass Check individually to find any rule violations. Fix them, and then submit again.
💡 If you have any trouble with submission or are concerned about submission rule restrictions, please also refer to the Reverse Index.
If you still have questions regarding the submission, please ask in the Vket Exhibitor Discord (https://vket.com/docs/channel).
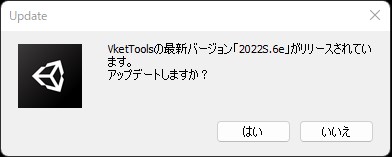
In case new versions of VketTools are released in the future for patches or other reasons, you'll be prompted to update with a dialog. Note that you can only submit with the latest version.
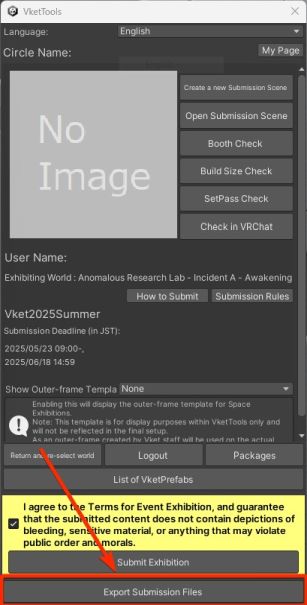
By clicking "Export Submission Files" at the bottom of the VketTools Control Panel, you can output a .unitypackage file.
This feature is useful for sharing submission data between members.
↑ Back to Top