How to Use MeshBaker
Mesh Baker is a Unity asset that atlases textures and combines meshes, sold at the AssetStore by Ian Deane.
When submitting Vket exhibitions on Unity, the exhibitor must be aware of reducing SetPassCalls and Batches for optimized performance. The Mesh Baker is a useful tool to optimize performance on Unity.
In this article, we will go over how you can use Mesh Baker to reduce rendering costs. Information is based on Unity 2022.3.22f1 (as of October 2024).
A free version with limitations and a complete version without limitations are available.
- Merge multiple textures into one, and reflect changes to the original mesh's UV.
- Merge multiple meshes into one.
Although it can convert Skinned Mesh Renderer to Mesh Renderer, it won't convert Bone Transform and BlendShape values.
You can reset BlendShape values again, but you can't recreate poses since Bone would be deleted.
Note: For baking Skinned Mesh Renderers, please also use the SkinnedMeshBaker.
Of the limitations of the Free version, these points are important.
- In the Free version, there is a limit to Shaders that could be atlas-able. Any Material other than Diffuse or Bumped Diffuse will result in an error message when attempting to merge.
- This limitation makes shaders such as Arktoon and UTS unatlas-able om the Free version.
- Workaround 1: Use other methods (such as Blender's atlasing plugins) for texture atlasing.
- Workaround 2: Change the Material to Diffuse or BumpedDiffuse, use this tool to make an atlas, and then redo the Shader settings.
- Only "Bake Into Scene Object" is available on the Free version, that is Baked data can't be saved as an individual file outside the Scene file.
- Due to this limitation, meshes on Avatars uploaded to VRChat will be rendered invisible.
- This does not cause any issues for uploaded VRChat Worlds.
- So it should be fine for submitting for Vket2022 Winter
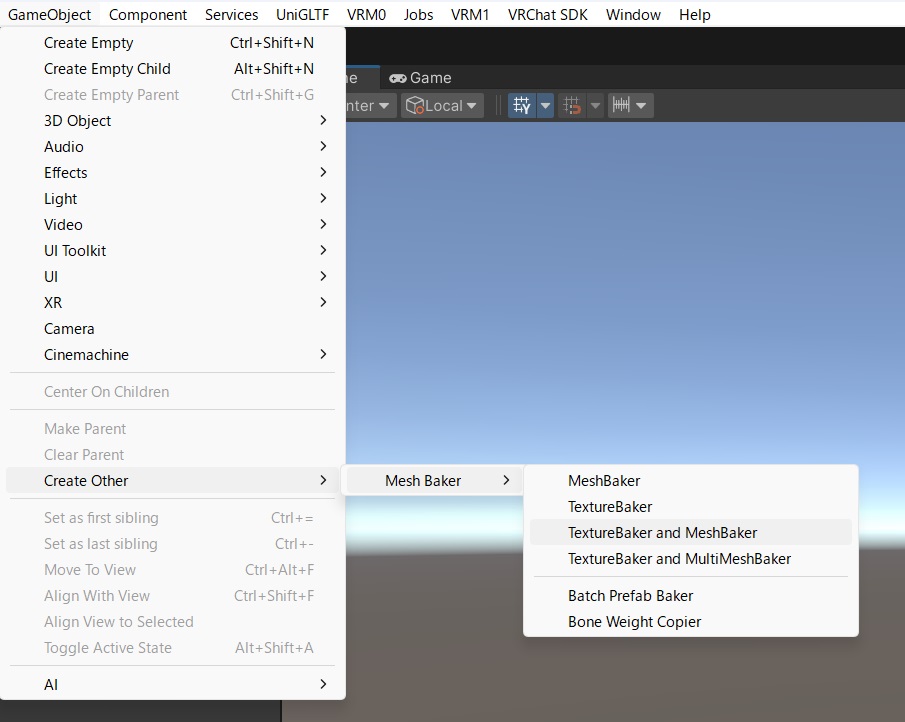
Mesh Baker merging procedure is mainly divided into two parts.
- A. Texture atlasing and Material merging
- Atlasing (packs multiple texture into a single texture)
- Exporting the atlased result into a Material
- The process will be handled by the TextureBaker
- B. Mesh merging
- Merging multiple meshes and exporting as a single mesh
- If the textures are atlased beforehand, uses the result and reconfigures the UV of the mesh
It's possible to perform A→B, or even just B.
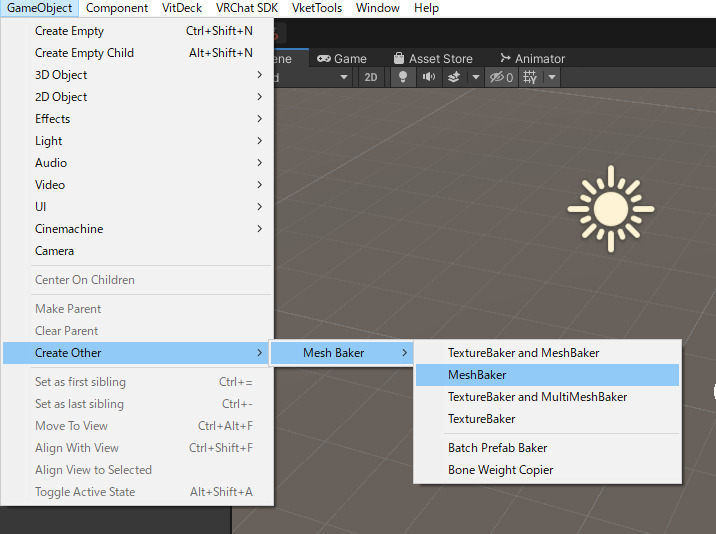
This creates the objects that perform the atlasing and the objects for the Mesh merging.
Drag and Drop into the red-marked area. Added objects can be viewed from Objects To Be Combined. You can also select Open Tools For Adding Objects to add object.
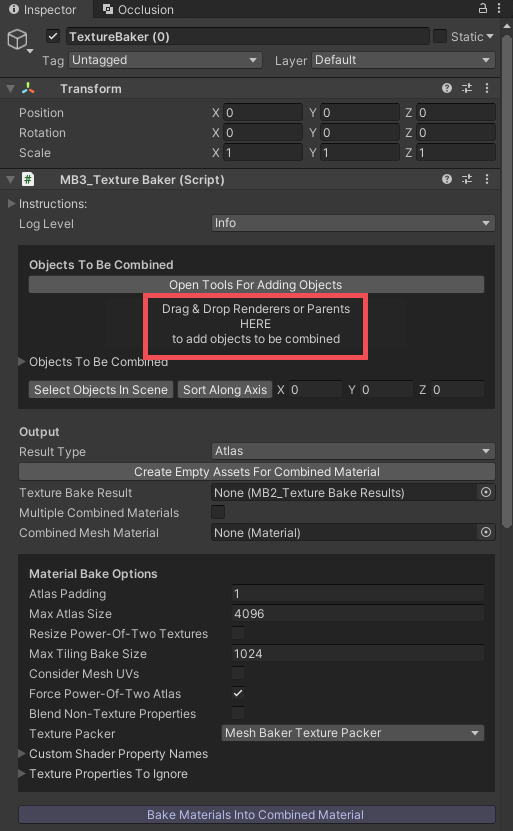
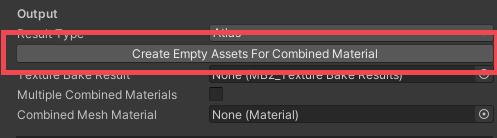
This opens a dialogue for saving the .asset file. Set the file name for the Baked result to be saved under.
The Baked result will be saved inside the same folder, so it is recommended to make a temporary folder for storing the results.
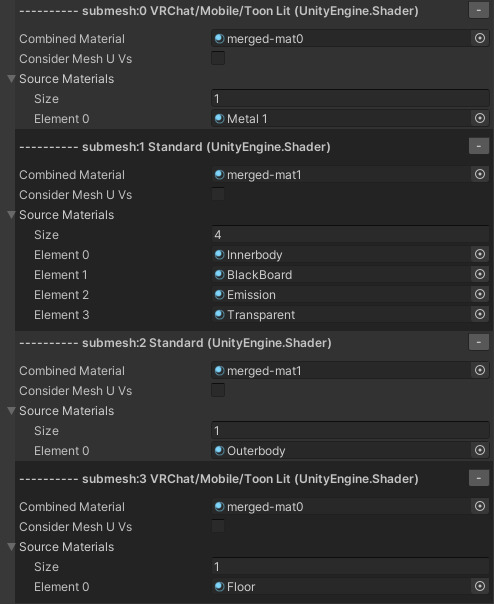
Check Multiple Combined Materials and click Build Source To Combined Mapping From Objects To Be Combined to select the Materials to be merged.

"Combined Material(the result from merging)" and "Source Materials(the materials that get merged)" will be listed up for each of the submesh.
You can change what Materials gets merged by editing "Source Materials". We advise merging the same types of Shaders.
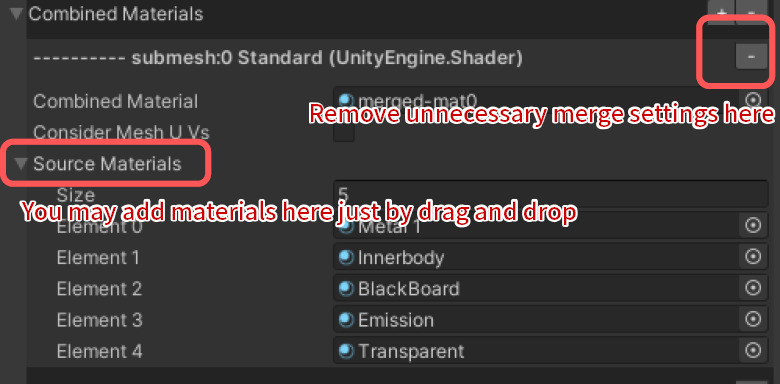
For this example, we'll merge the same Shaders like below.
Click on Bake Materials Into Combined Material to begin atlasing and merging.
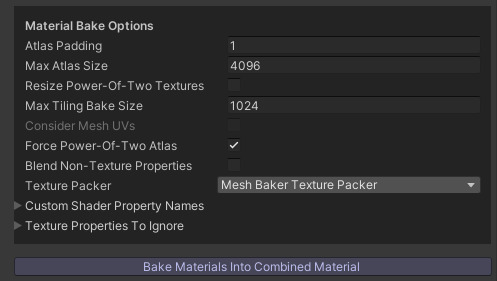
An error message "The free version of Mesh Baker only works with Diffuse and Bumped Diffuse Shaders." will appear on the console when using Shaders other than Diffuse, or Bumped Diffuse with the Free version.
At this point a copy of the texture and the Material should be stored in the specified folder.
The Object "MeshBaker" exists as a child of "TextureBaker." You will use MeshBaker for merging Meshes, but the export settings will have to be done on MeshBakerGrouper inside TextureBaker.
As appearing below, it will carry out the method B-4 on the object set in the Use Shared Settings. By clearing the Use Shared Settings you can make individual settings for the disabled area.

If you only want to do Mesh merging, start from step B-1.
If you've used the TextureBaker in the previous step, skip to B-3.
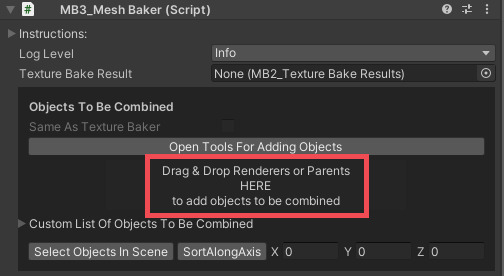
If you don't want the texture atlased, and only want to merge the Mesh, Create the MeshBaker from GameObject
Drag & Drop into the red marked area. Added objects could be checked from Custom List Of Objects To Be Combined.
You can only choose Output Into Scene Object for Free version. If using the paid version, we recommend using the Bake Into Prefab to save the mesh info as proper file data.
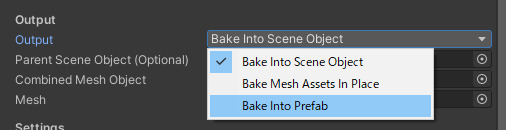
If using Output Into Scene Object, you can specify where the combined mesh would go with the Combined Mesh Object.
Having nothing specified will create a new Object in Hierarchy so it's fine to leave it as it is.
If you are using Bake Into Prefab, set the Prefab file from the Project window into Combined Mesh Prefab.
An .asset file containing the mesh data will also be generated in that folder.
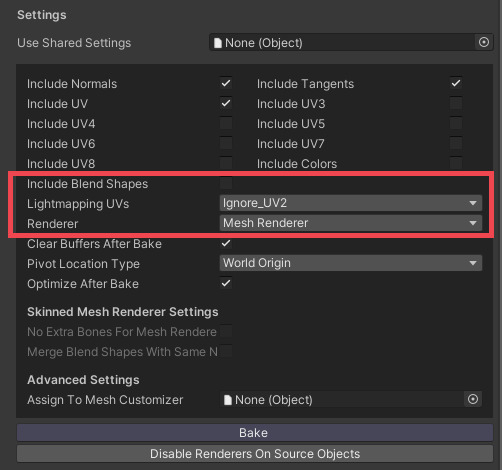
You can select the output to be either "Mesh Renderer" or "Skinned Mesh Renderer" in Renderer. The bones tied to "Skinned Mesh Renderer" will stay the same as the pre-merged Mesh's Armature.
Shapekeys could be copied by enabling Include Blend Shapes and setting output to Skinned Mesh Renderer. However, the key's names will be changed to prevent overlaps, so you would have to reconfigure Animations.
Lightmapping UVs needs to be configured when merging Light Bake-targeted(Lightmap Static) Meshes.
- Meshes not intended for Light Bake
- Ignore_UV2 is fine. UV2 will not be copied to the merged Mesh.
- Meshes intended for Light Bake, which uses Generate Lightmap UVs to generate UV2
- Select Generate_new_UV2_layout. Mesh Baker will auto-generate anew UV2.
- Meshes intended for Light Bake, which has its own UV2
- Select Copy_UV2_unchanged_to_separate_rects. UV2 resembling the pre-merge Mesh should be generated.
Hit Bake to output the merged Mesh to the specified target file location using the specified settings.
You can still use the original Mesh if you decide you want to change some settings and re-merge.
The original Texture, Material, and Meshes will stay as it is, so make sure not to keep them in the submission folder.
Also, make sure to check the asset folder if the original mesh and textures are not remaining.

