Vket Submission 101
Use VRChat Creator Companion and Unity on a Windows PC to create your exhibits (such as a combination of 3D models), and submit them using VketTools (the submission tool).
Create an exhibition space easily using the "Vket Booth Maker" service, using easy and casual tools.
As creation and submission is completed on the Web browser, VRChat Creator Companion and Unity are unneeded!
Some exhibition formats support submission via Vket Booth Maker.
For details on supported formats, please refer to the exhibition guidelines and the relevant Submission Rules.
VRChat offers a support software for creators namedVRChat Creator Companion(VCC), which will handle installation, update, and management of the software used for avatar and world upload to VRChat.
It will not only install all the necessary software like Unity and UnityHub automatically but also update Unity and SDK when necessary.
*The application also allows you to convert and open your older projects in the latest setup. Make sure to back up your projects.
For details about VRChat Creator Companion (VCC), please refer to the official documents.

Unity is a game engine that you can use to develop games and apps.
It is also used to upload avatars and worlds onto VRChat.
For Vket Unity Submission (VketTools), it is necessary to use Unity in order to submit your content.
In Vket, we will use VRChat Creator Companion to install Unity version2022.3.22f1.
For instructions on installing VRChat Creator Companion and Unity, please refer to VRChat Creator Companion Setup.
The first thing you do when using Unity is to create a Unity Project.
A Unity Project holds all the necessary files that you use in Unity.
If you’re going to use Unity for VRChat, you’re most likely doing one of the following.
To allow users to try on an avatar using an avatar pedestal, you need to upload the avatar.
To upload avatars, choose Unity 2022 Avatar Project from the Official Templates in VCC.
You will be adding the files of the model, texture, shader, animation, etc. of your avatar to the Unity Project folder.
*For submitting exhibitions for Vket, please create the project using the Unity 2022 World Project template.
To upload worlds, choose Unity 2022 World Project from the Official Templates in VCC.
You will be adding the files of the model, texture, shader, Udon gimmick, etc., of your World to the Unity Project folder.
While the submission scene for Vket is basically the same as creating an ordinary world, biggest difference is that you will need to import a special tool called VketTools.
As such, please create a new Unity Project with which you haven’t previously used for uploading avatars or worlds.
Also, to prevent unexpected errors, please create different projects on submitting different exhibition formats.
When uploading an avatar or a world, as well as for the submission for Vket, you will need to create a Scene, which is basically a place for you to work using Unity.
To upload an avatar, place your avatar in the scene and choose the avatar you wish to use in the VRChat SDK window.
*If you have just one avatar, you won’t need to choose in the VRChat SDK window.
When uploading a world, all the objects placed in the scene will be uploaded together as a world.
Your worlds will then be placed in the scene of Vket venue worlds so that they can be accessible in VRChat. The last bit will be done by our staff members.
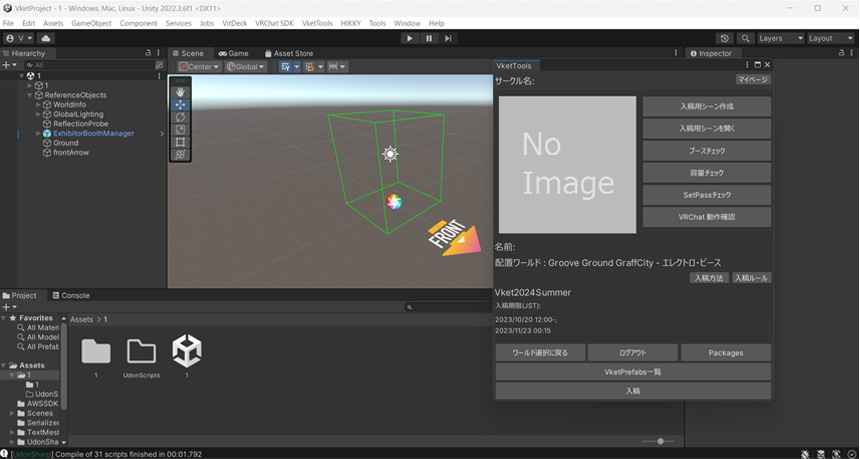
All exhibitors must place their exhibits in a Scene specially prepared for submission. When you press Submit in VketTools, all objects inside Circle ID object in the Circle ID scene will be sent to Vket organizers, packaged together with all assets inside Assets/Circle ID folder.
The submitted object will then be placed in the venue world, which will be uploaded as a single world to VRChat by the organizers.
The following are already prepared within the scene.
- Lights and other objects necessary for VketTools to start a Submission Rule Check.
- Minimum required Objects, such as a floor, to launch VRChat and make a local test.
- Hierarchy structure in a Scene, which is required in the submission rules.
*Hierarchy will be explained later.
You must import the files of models and textures into the Unity Project when using Unity to upload an avatar or a world, as well as for the submission for Vket.
To import files into your Unity Project, simply drag and drop the files onto a section called “Project” which is located at the bottom of the Unity window.
Unity Package is a collection of files consisting of your models, textures, etc. so that the import can be done easily. The file extension of such packages will be .unitypackage.
*This is actually called Asset Packages in the Unity manual. Below is a link to the manual if you are interested.
Asset Package - Unity Manual
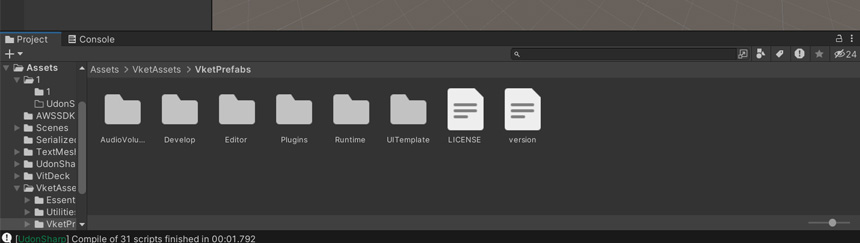
The following tool must be imported into your Unity Project for the submission. The tool is distributed as a Unity Package.
For instructions on how to download VketTools, please refer to How to install VketTools.
VketTools can be downloaded by the owner of a winning circle.
If there are collaborators, please invite them as members of the circle and then share VketTools with them.
You will need to import the Unity Package of the VRChat SDK when you upload your avatars and Worlds using Unity.
The VRChat SDK that you need to use is different depending on whether you want to upload an avatar or a World. You cannot import both types of VRChat SDK into a single Unity Project, so you will have to make a separate Project for you to do both.
For Vket, the VRChat SDK needs to be imported using VCC.
VketTools is a tool you will be using when you submit your exhibits.
This tool has the following functions:
- Log in to your VketAccount on Unity
- Create an empty Scene for your submission
- Check whether your exhibits follow the submission rules
- Make the submission
Files with models, textures, etc., that have been imported into the Unity Project are called Assets.
All Assets are placed in a folder named “Assets” inside the Unity Project folder. The Assets folder is the first folder you can see in the Project window at the bottom of the Unity window.
VRChat SDK and VketTools are also a type of Assets that are imported into the Assets folder.
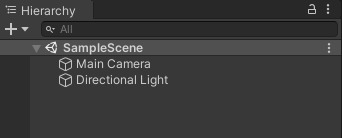
Hierarchy is a window displaying Objects within a Scene.
The hierarchy window is on the left side of the Unity window, and it displays the Hierarchy of the current Scene.
In the Hierarchy window, you will see a triangle that shows the relationship between Objects, just like a folder in a PC.
The way to make the necessary Hierarchy of a Scene for the submission is explained in the submission rules. It will be further explained in the Static section and the Dynamic section.
Objects such as models that are placed within a Hierarchy are called GameObjects in Unity.
All Objects displayed in the Hierarchy are GameObjects. GameObjects include not only models, lights, and colliders, but also dummy objects that are used solely for establishing structure within the Hierarchy.
The role of a specific GameObject is determined by what kind of Component it contains. The Component of a GameObject can be seen in the Inspector window on the right side of the Unity window when you select the GameObject.
For example, a GameObject that was created by dragging and dropping an fbx file onto the Hierarchy will automatically contain Components of “Mesh Filter” or “Mesh Renderer.” A model of an avatar which would have a bone structure would contain a Component of “Skinned Mesh Renderer.”
Components are more or less decided automatically depending on the type of GameObjects you have. You can create GameObjects with the specific Components by right-clicking on the Hierarchy window. “Create Empty” would create a GameObject without any Components besides one called Transform Component, which can show the coordinates.
In the Inspector window, there are various values set for the Components, and by changing these values, you can change the attributes of each Component.
For example, Transform Component shows the position, rotation angle, and scaling within a 3D space, and these can be changed by changing the values.
Also, you can add or delete Components to or from an already existing GameObject.
The 3D model placed in a Scene is assigned a Material to set its color, texture, etc.
You can also choose to use a specific shader for the Material, and depending on which shader you use, the specific changes you can make will differ.
The background model for Worlds and exhibits is usually a shader called “Standard,” but this isn’t the best when you have an avatar. Therefore, you might want to use the Standard shader only for the buildings in your exhibits, and use a different shader for your avatar pedestal 3D model .
A number of different shaders will be imported with VketTools for the submission. You can either choose the shaders that were imported, or if you want something else, import a different shader into your Unity Project.
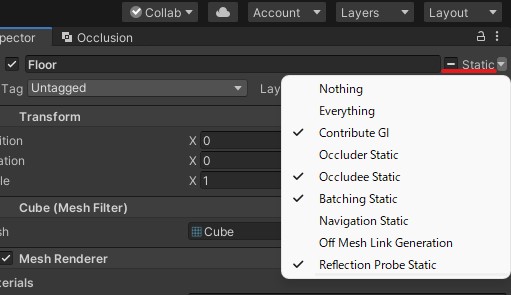
Once you place a GameObject onto the Hierarchy, the following information will be automatically set in order to optimize certain aspects of the Objects, such as the graphics processing of static Objects.
- This GameObject is static.
- This GameObject can move through animation, interaction, etc.
A GameObject that does not move is called “static,” and one that moves is called “dynamic.”
To optimize your Worlds, please set the GameObjects either to static or dynamic before submission.
In the submission rules, it is stated that all static GameObjects should be under the name “Static,” and all dynamic GameObjects should be under the name “Dynamic” within the Hierarchy.
For example, the background model of your exhibits could be placed under static and models that move with an animation can be placed under dynamic.
Also, when you use an avatar with a model such as avatar pedestal, the shader for avatars might not work properly when it’s set to static. In this case, please set it to dynamic to avoid problems in the looks.
e.g. The thickness of the outline can change if it’s set to static with UTS2.
When you create a reusable Asset that is a part of a GameObject Hierarchy, it is called a Prefab. You can create a Prefab just by dragging and dropping a GameObject from the Hierarchy to the Project window.
If you drag and drop the Prefab back onto the Hierarchy, it will create a copy.
This is useful when you want to reuse a combination of multiple GameObjects.
In VRChat, many people upload their avatars by dragging and dropping a Prefab already set up with PhysBones or VRC Avatar Descriptor. Many also use video players by dragging and dropping the Prefab of iwaSync video player.
Udon is a programming language used to implement gimmicks in a VRChat World.
Usually, if you want to create a gimmick and include it in the World, you will have to create a program using Udon. However, there are many programs that are already built for you to use just by dragging and dropping its Prefab onto the Hierarchy.
We have prepared some Prefabs of Udon gimmicks that can be useful for your submission. Please check the manual for more information.
Official Package
For instructions to submit exhibitions for Vket, please refer to the Submission Guide.
For technical tips and tricks to improve your exhibits (lighting, optimization, etc.), please check our Technical Guides / Submission Tips Index.

