← Back to Technical Guides
How to Create VRM File
VRM is a data format tailored for humanoid avatar data aimed at VR apps.
The format is based on a standardized 3D data format called glTF.
By using the VRM as a shared format, you can enter the worlds of various apps using the same avatar.
Vket uses VRM format for rendering models in the browser venue “VketCloud”.
*VRM has two versions : vrm-0.X and vrm-1.0. As Vket only accepts vrm-0.X on submission, please do not use vrm-1.0!
Basically, vrm files can be used on any VRM applications.
The file format is supported by streaming apps for Vtubers, avatar photography apps, and certain VRSNS. Creators may include their VRM as part of their avatar packages, intended for use on such apps.
Also, VRM format may occasionally be used in Vket submissions, as for accepting avatar data by VRM models on the Web Submission.
*Availability of submission using VRM may vary among events, so please refer to the exhibition guideline for details.
VRM files can be created by converting the original file with "UniVRM" on Unity.
Here, a rough overflow of the procedure will be explained.
*For details, please refer to the official reference of the VRM consortium.
https://vrm.dev/en/vrm/how_to_make_vrm/
Firstly, download the UniVRM. The latest edition would be the best option.
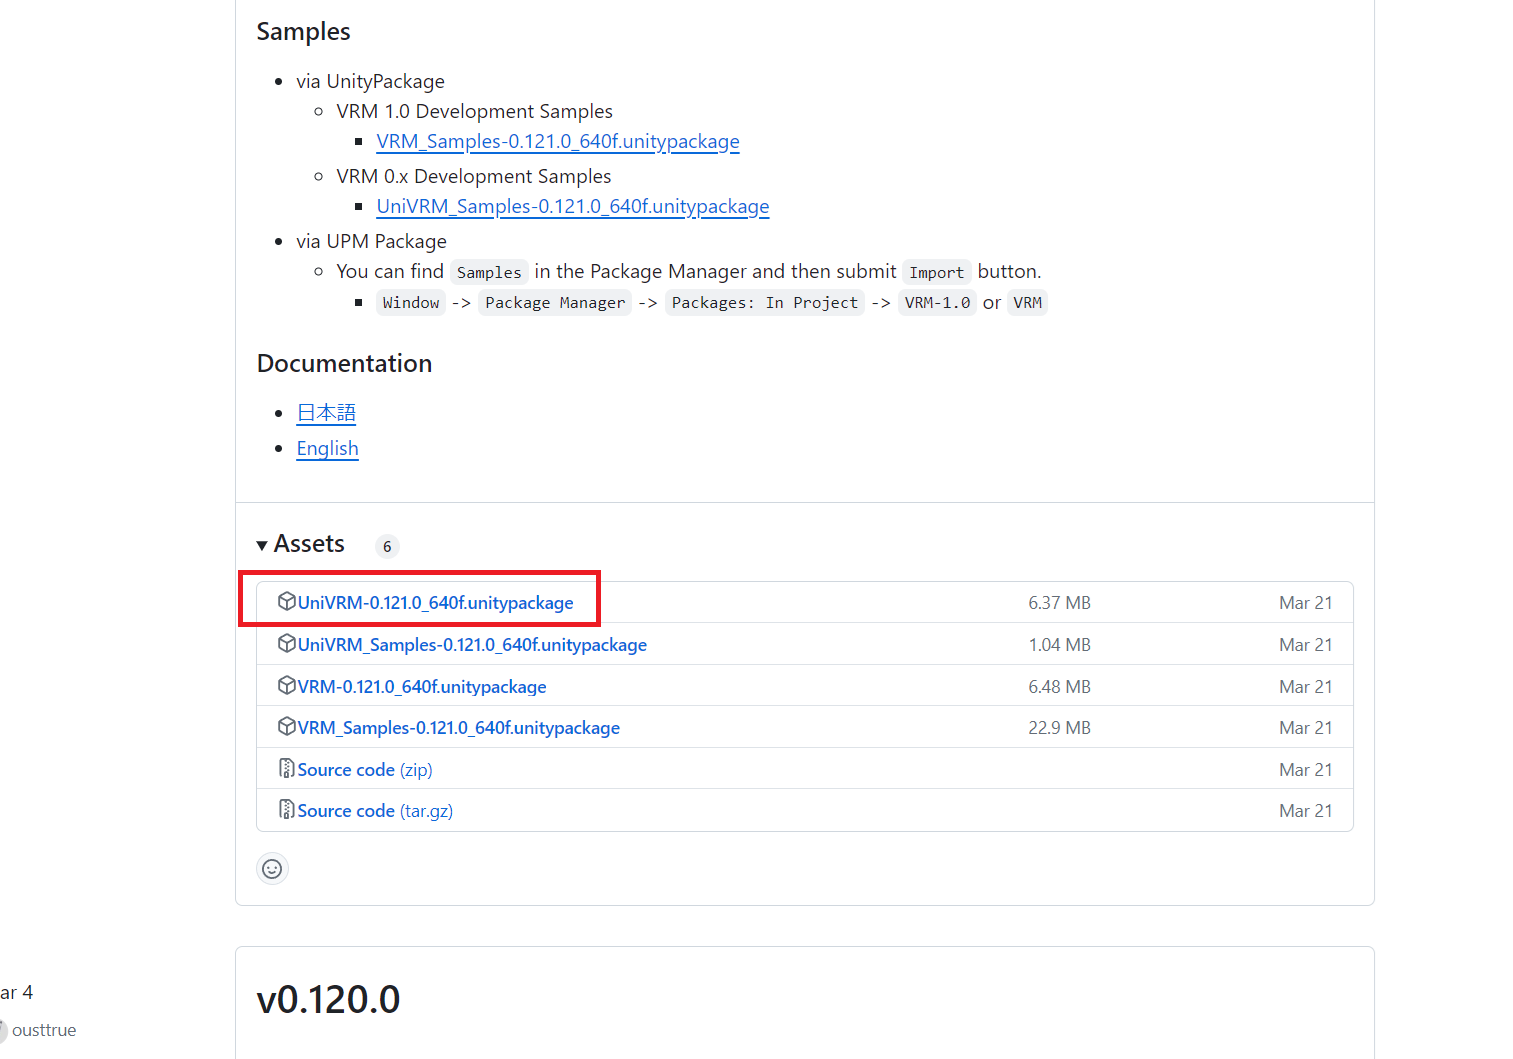
Open a Unity project, and drag & drop the downloaded UniVRM unitypackage to import.
*Please do not import UniVRM to the Unity project for creating Vket exhibitions. The files such as MToon shaders may conflict with files for submission!
- Import all necessary files of your model into Unity.
- Set materials of the model.
- In VRM, you may only use 3 kinds of shaders: MToon, Unlit, or Standard. If you are already using different shaders, please replace them with either one of MToon, Unlit, or Standard.
- If you choose to use MToon series, please use the "MToon" shader, as "MToon10" is for VRM 1.0.

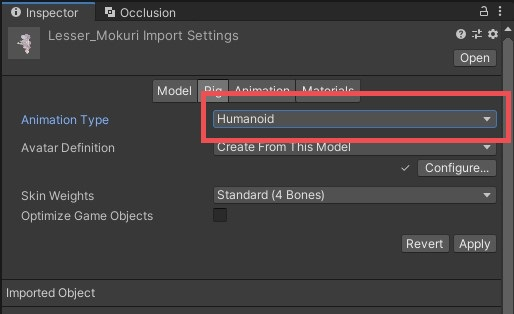
Set the model's Animation Type to "Humanoid", as like setting up an avatar for VRChat.
We will then temporarily turn the adjusted model into VRM and make the necessary settings.
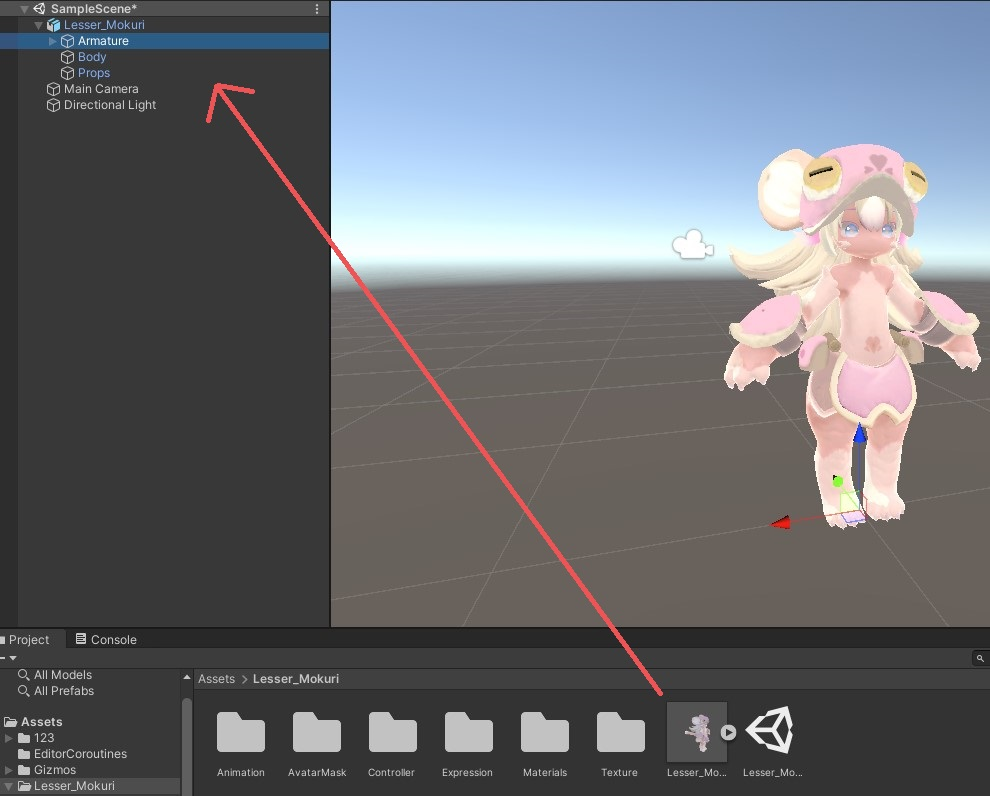
- Place the imported model on the scene.
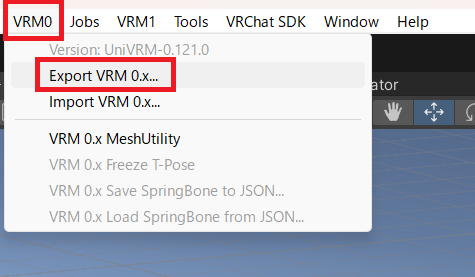
- Select VRM0 > Export VRM 0.x... from the menu.
*As the VRM1 menu will export the model in VRM 1.0 format, make sure to select VRM0.
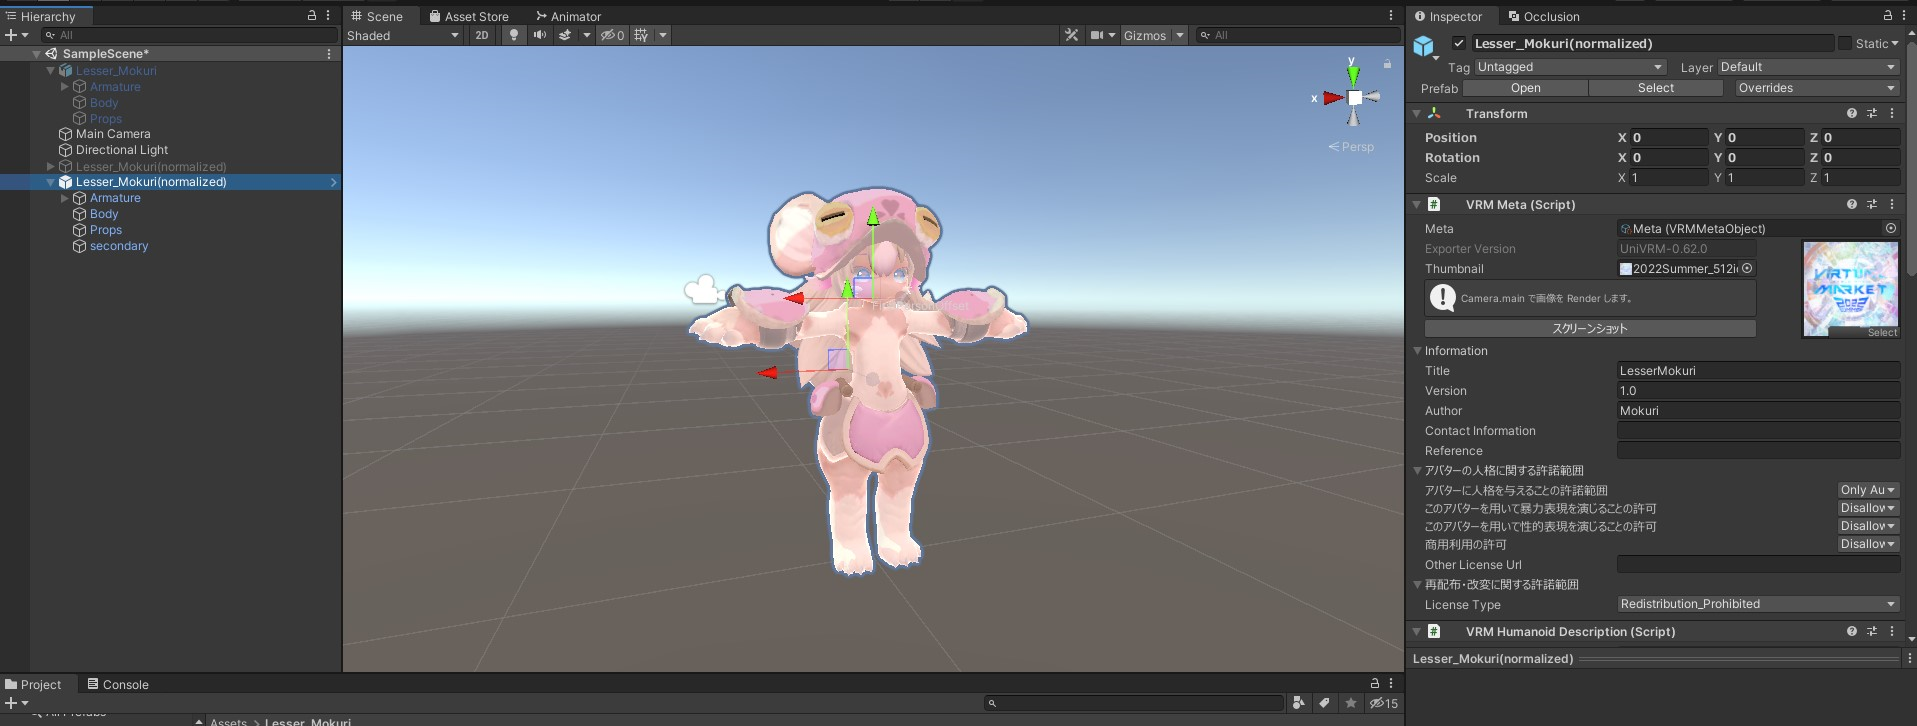
- You will see the VRM Exporter. Drop the model from the Hierarchy to ExportRoot.
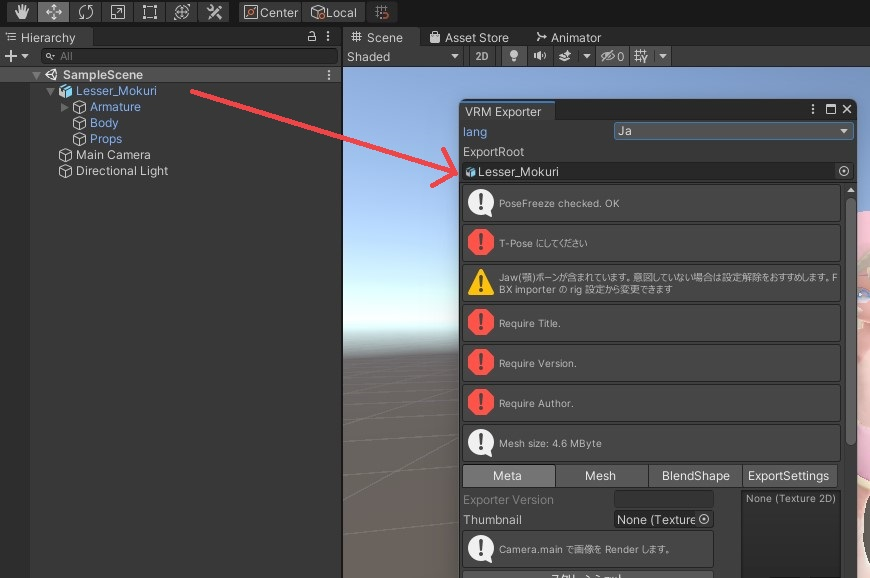
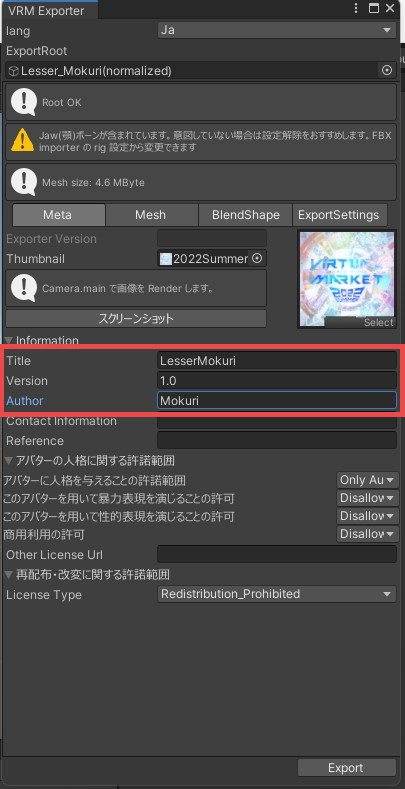
Title, Version, and Author are mandatory. Once all of the information are filled, you can click "Export". Optionally, you may set other parameters and the avatar thumbnail.
Now, export the VRM file! All files related to the VRM will be saved to the location of your choice.
*You may not be able to perform export if there are errors. Check the error message and make necessary adjustments. Refer to the official reference for details.
https://vrm.dev/en/how_to_make_vrm/convert_from_humanoid_model/
Here, we will adjust the normalized model again and bring it to completion.
- Reimport the exported VRM file to Unity.
If you have exported the vrm file under Unity project under work > Asset vrm, you do not need to reimport the file.
- Place the VRM model on the scene.
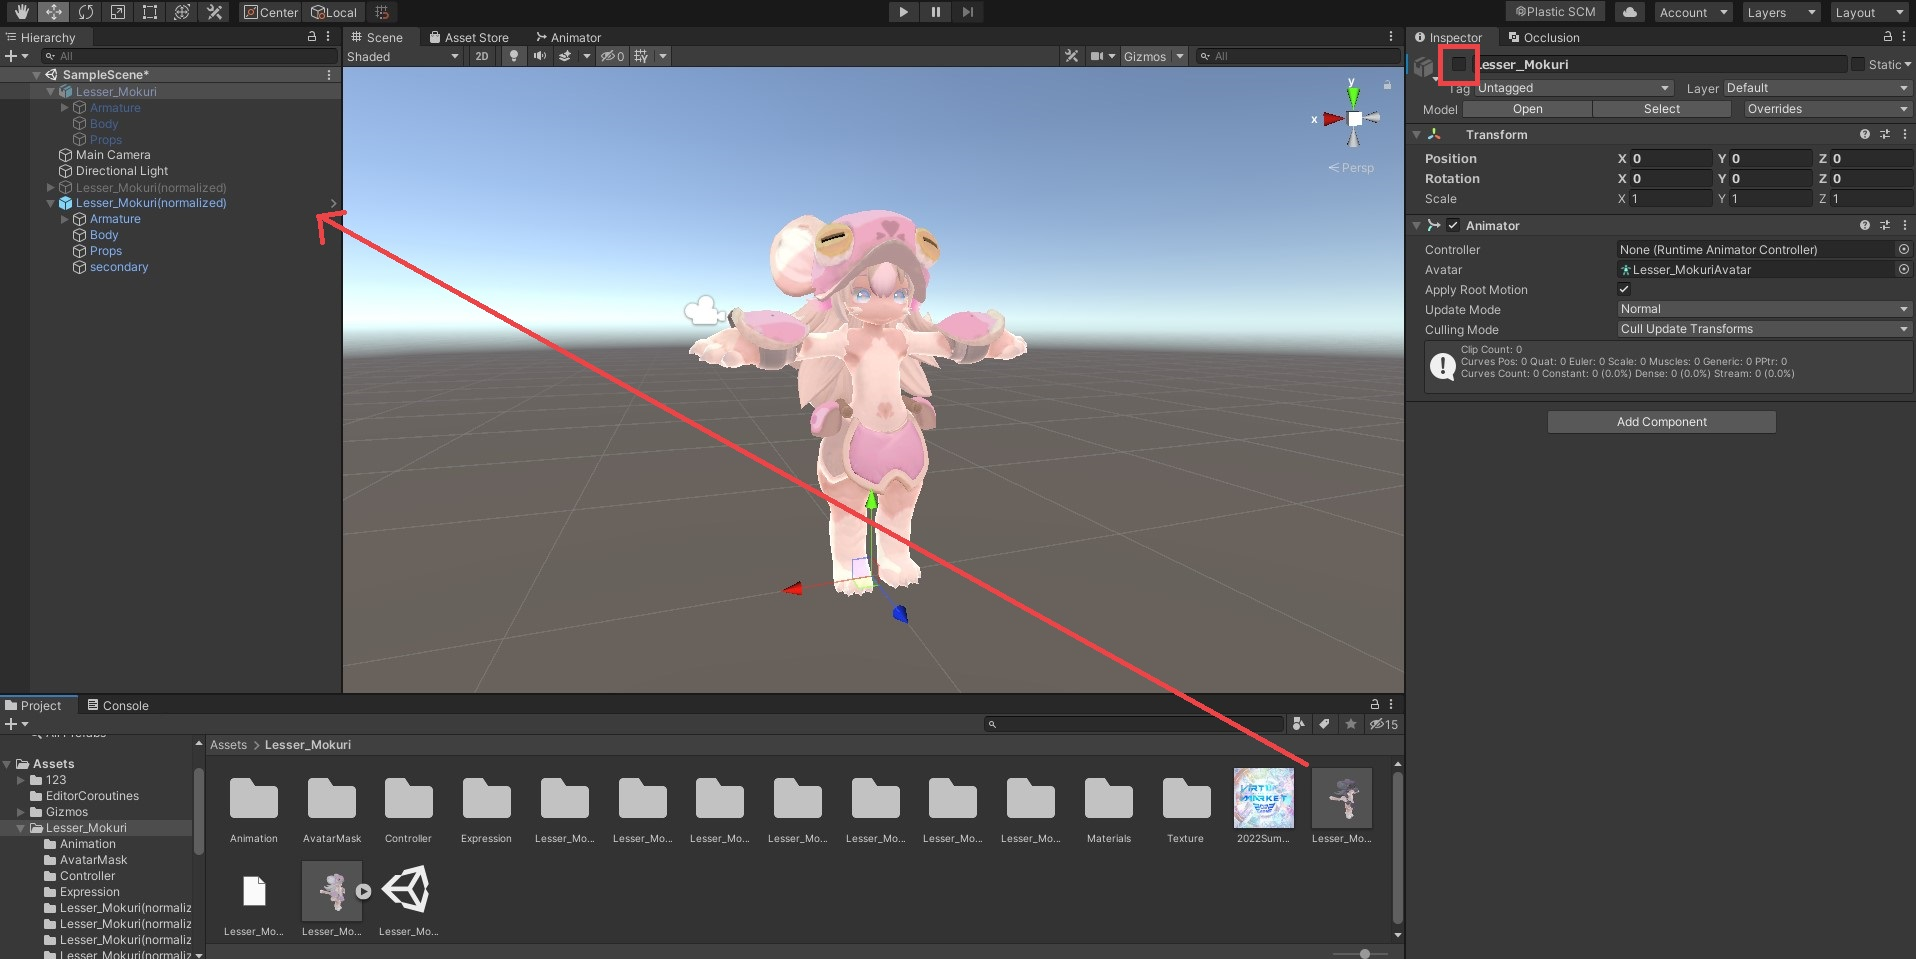
You will find a Prefab generated by the import. Drag and drop it into the scene. You may deactivate the fbx and other objects in the scene as you see fit.
- Select the VRM model and make various settings from the inspector, like the title, author, and license information.
*Optionally, you may also set expressions and movable parts at this moment. For details, please refer to the official reference.
https://vrm.dev/en/how_to_make_vrm/setup_vrm/
Once the adjustments are made, select the VRM model and selectVRM0 > Export VRM 0.x... from the menu again.
Export with the VRM Exporter and save at the location of your choice.
Great work! Now your VRM file is ready to go!
Check the Official Guidelines
Before submitting, please make sure to review the official rules and guidelines:
↑ Back to Top

